
Help
How to fill in and submit your timesheet
One timesheet per month and per contract. You fill it in, submit it, and your customer approves or rejects it by email.
Press Create timesheet
After signing in you are on All timesheets. Press the gold + Create timesheet button at the top, to the left of the filters, choose the contract and the month, and press Create. To continue a month you already started, click its line in the list instead.
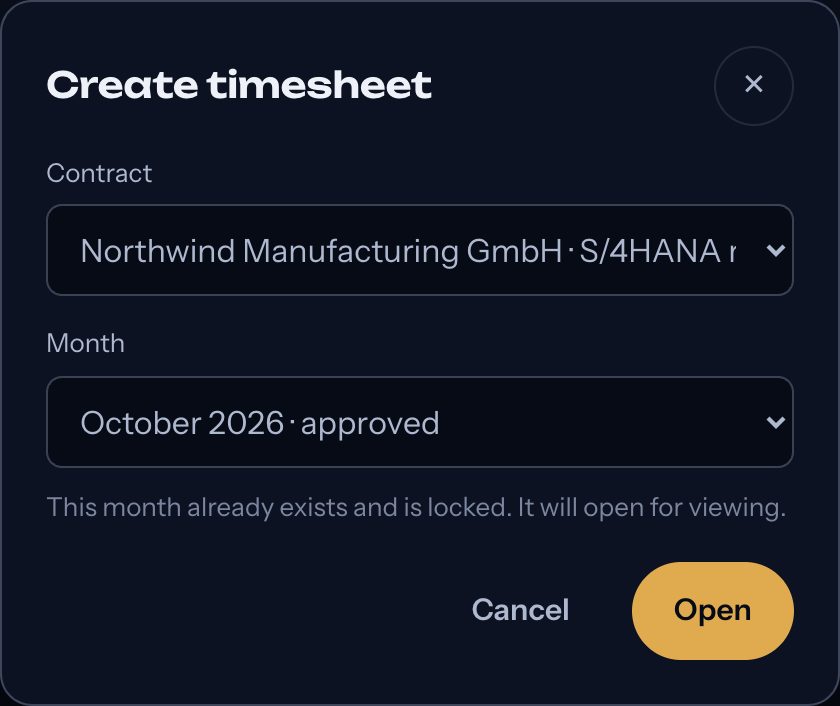
Check you are on the right month
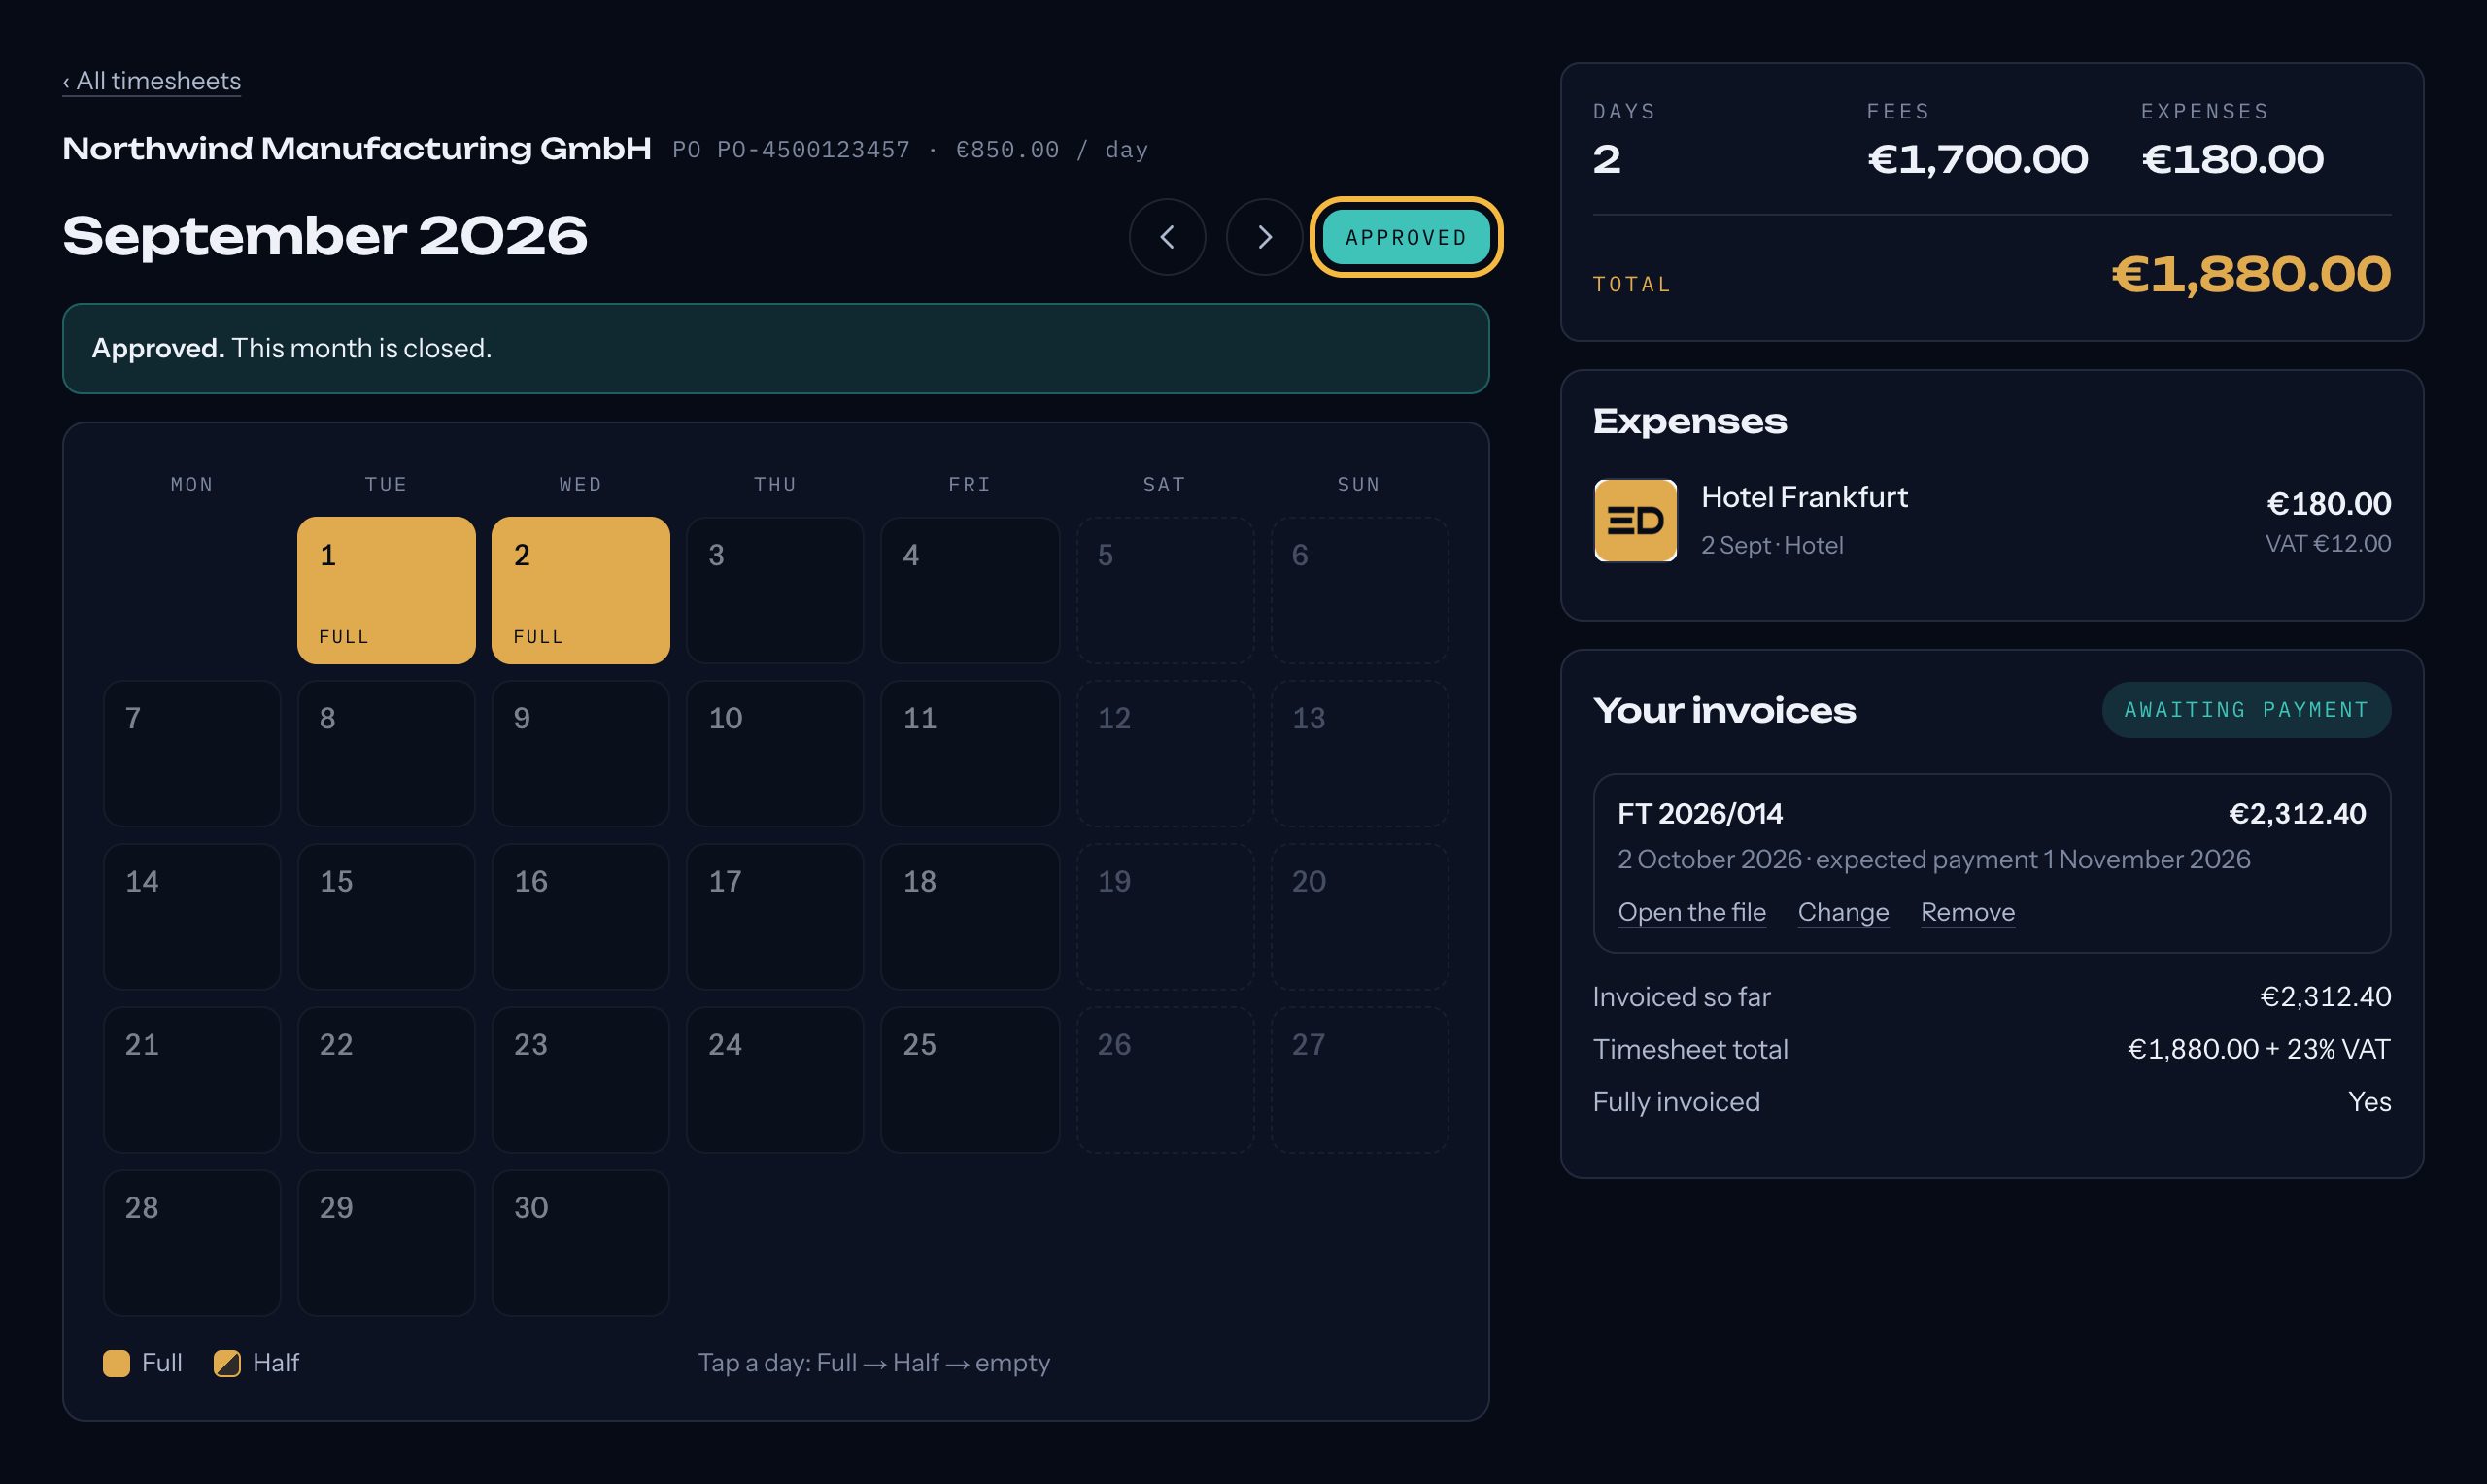
The month opens with its calendar. The arrows next to the month name move to the month before or after, and "‹ All timesheets" takes you back to the list. If you have more than one contract, choose it at the top first. The label next to the arrows shows the state of the month: Draft, Waiting, Approved or Rejected.
Mark the days you worked
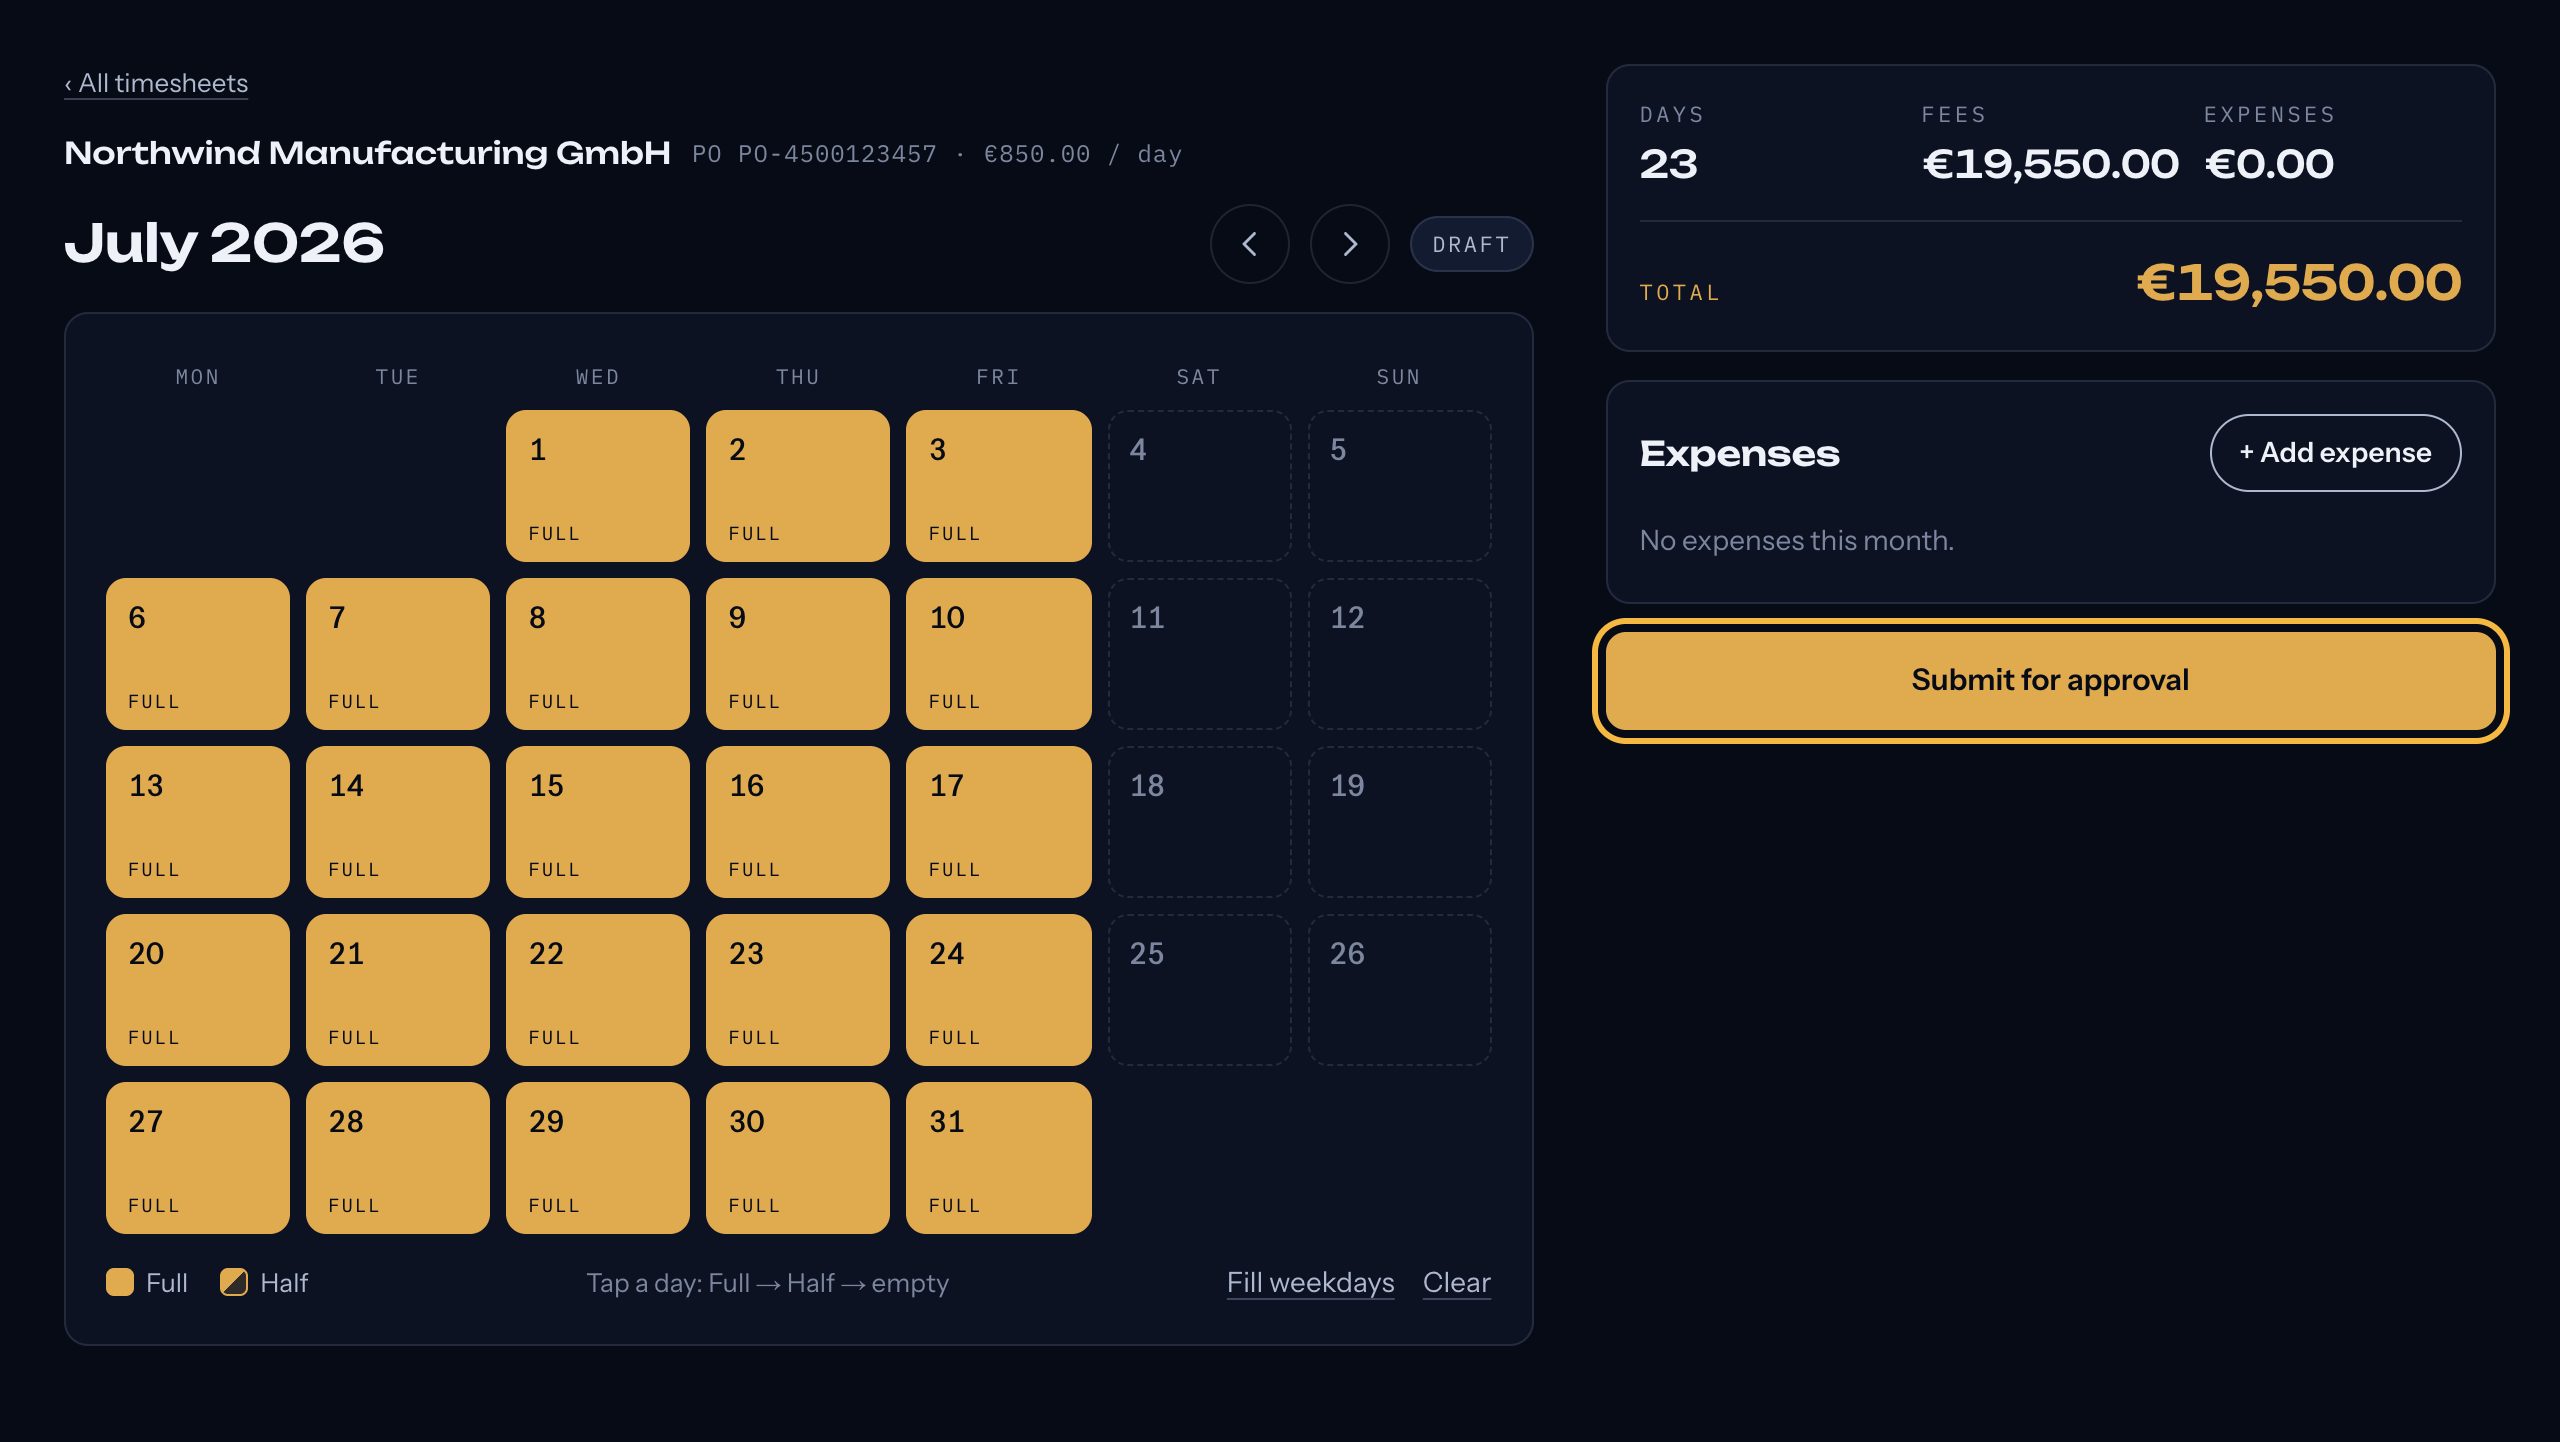
Tap a day once for a full day, again for a half day, and a third time to clear it. Fill weekdays marks Monday to Friday in one go; Clear empties the month. On an hourly contract, tapping a day opens a small box where you type the hours (quarter hours allowed). Days outside the contract dates cannot be selected.
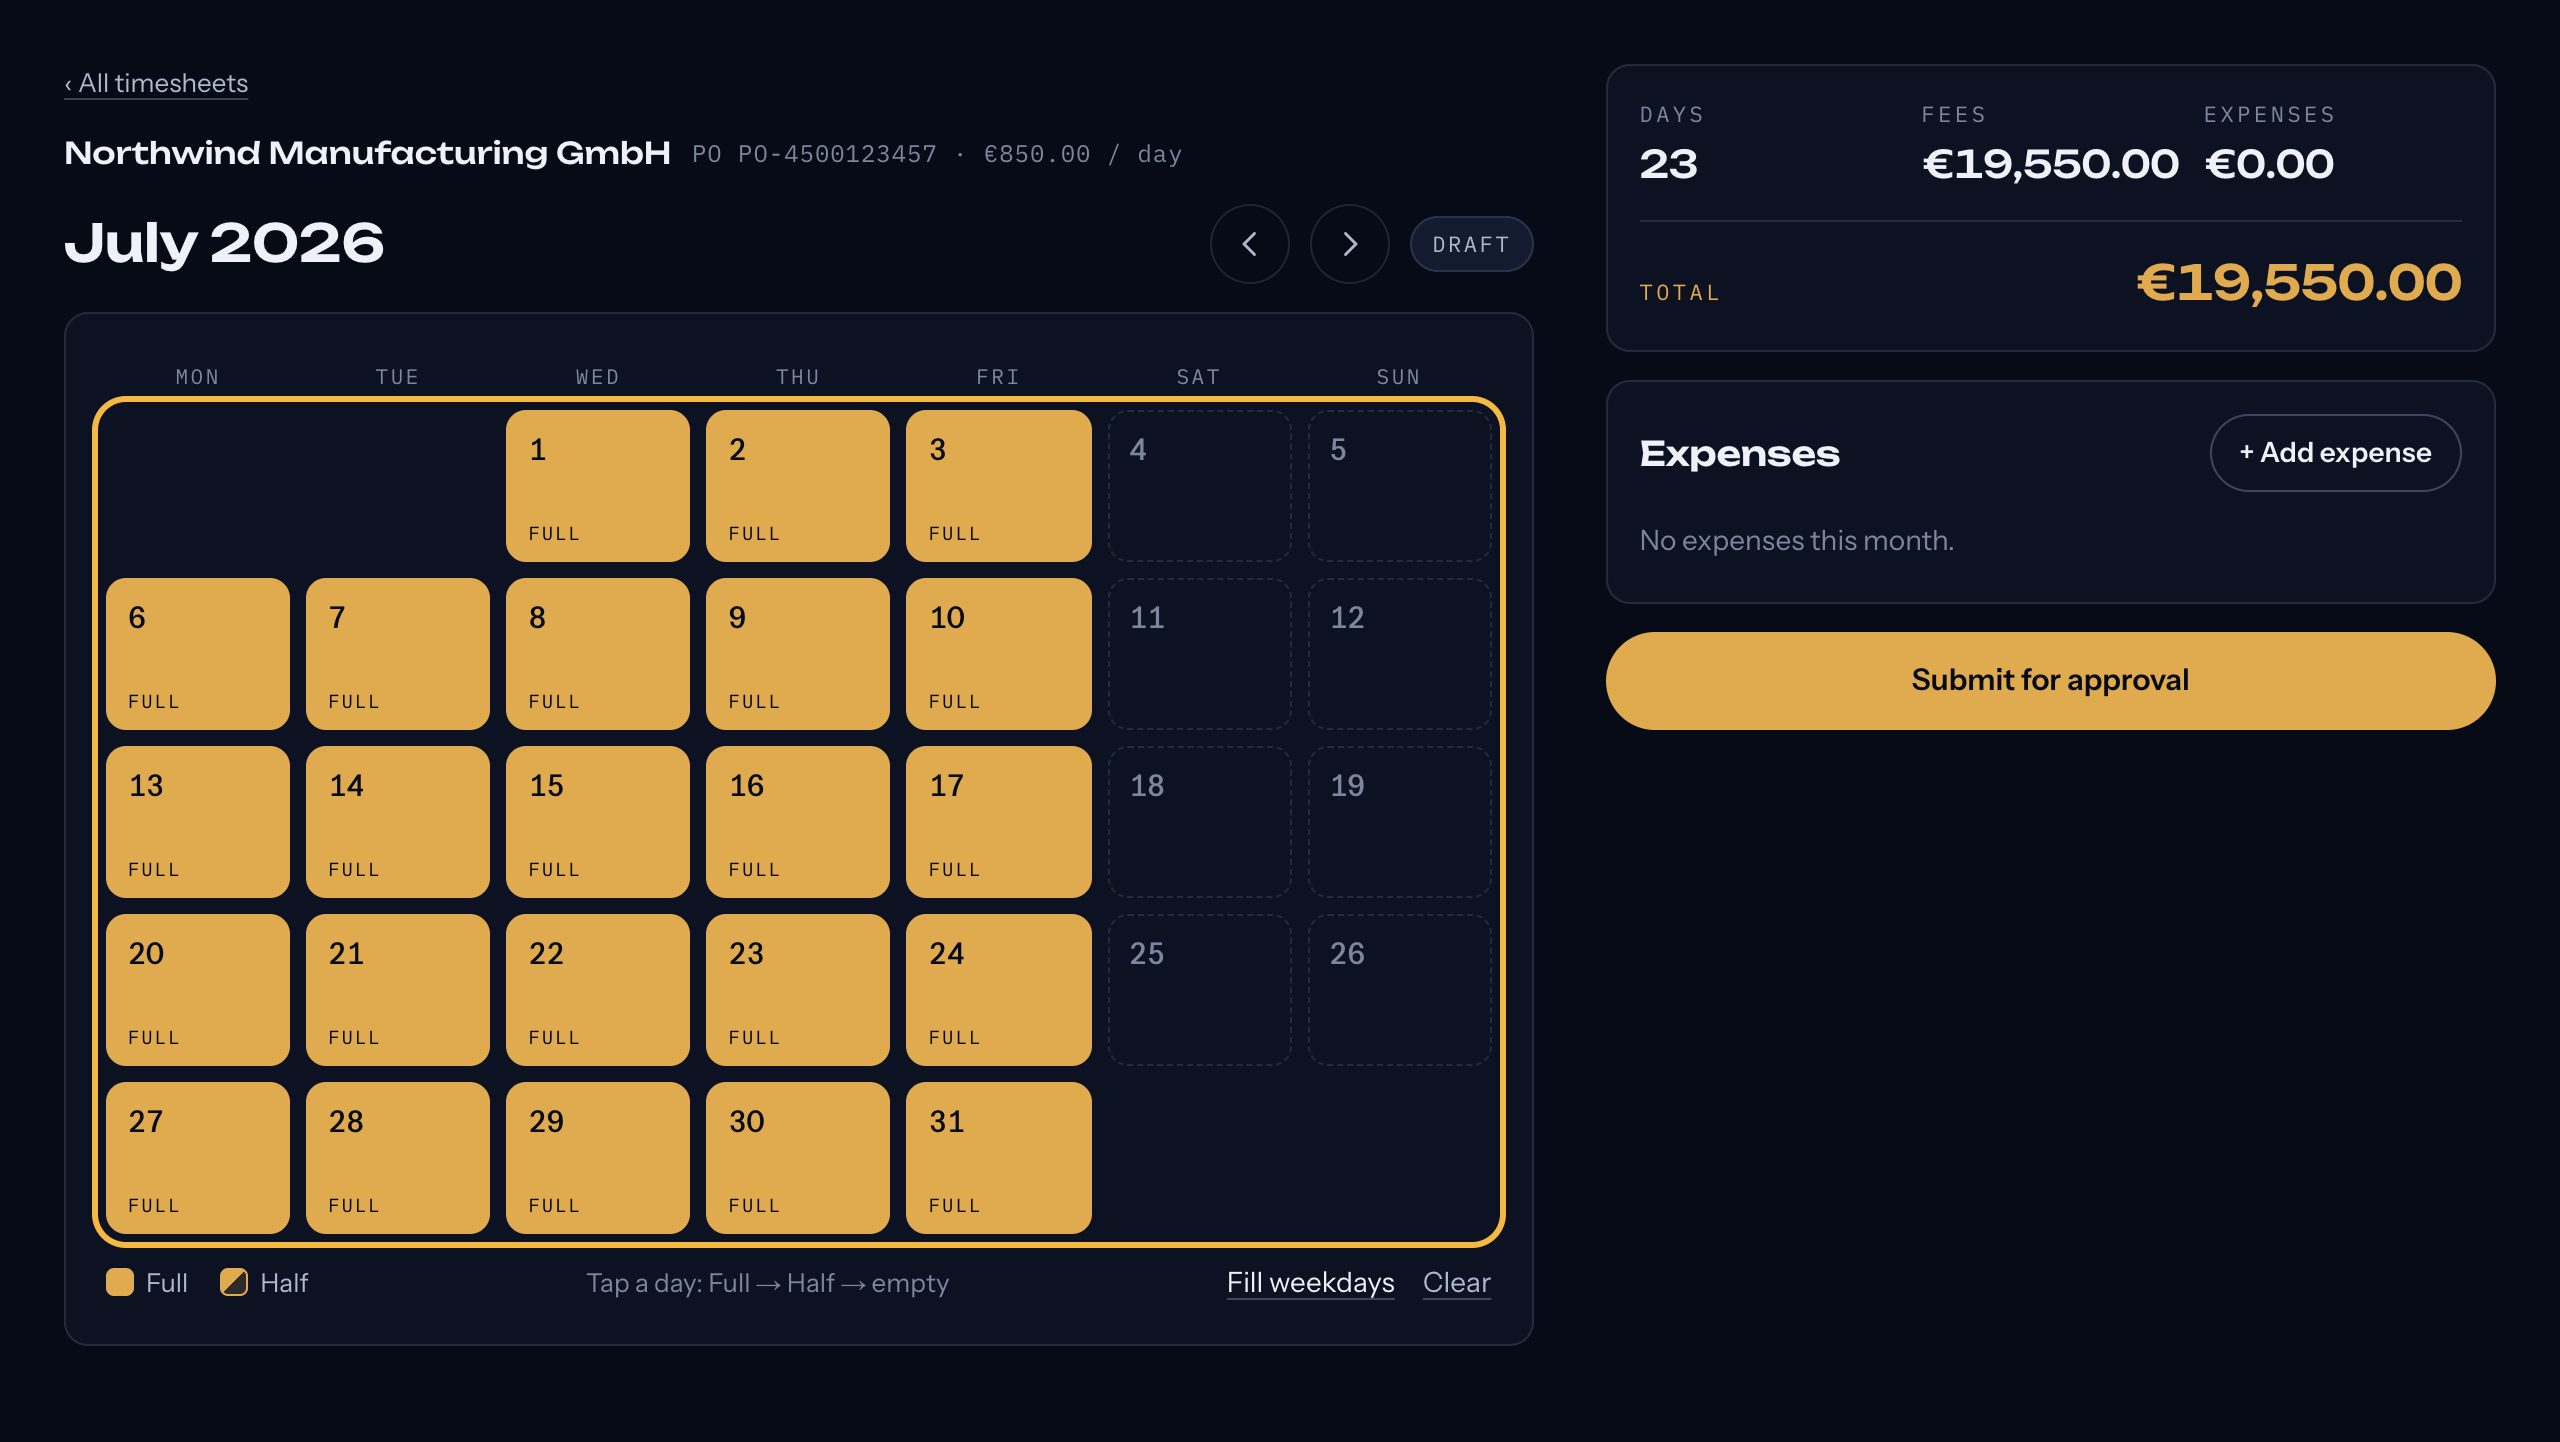
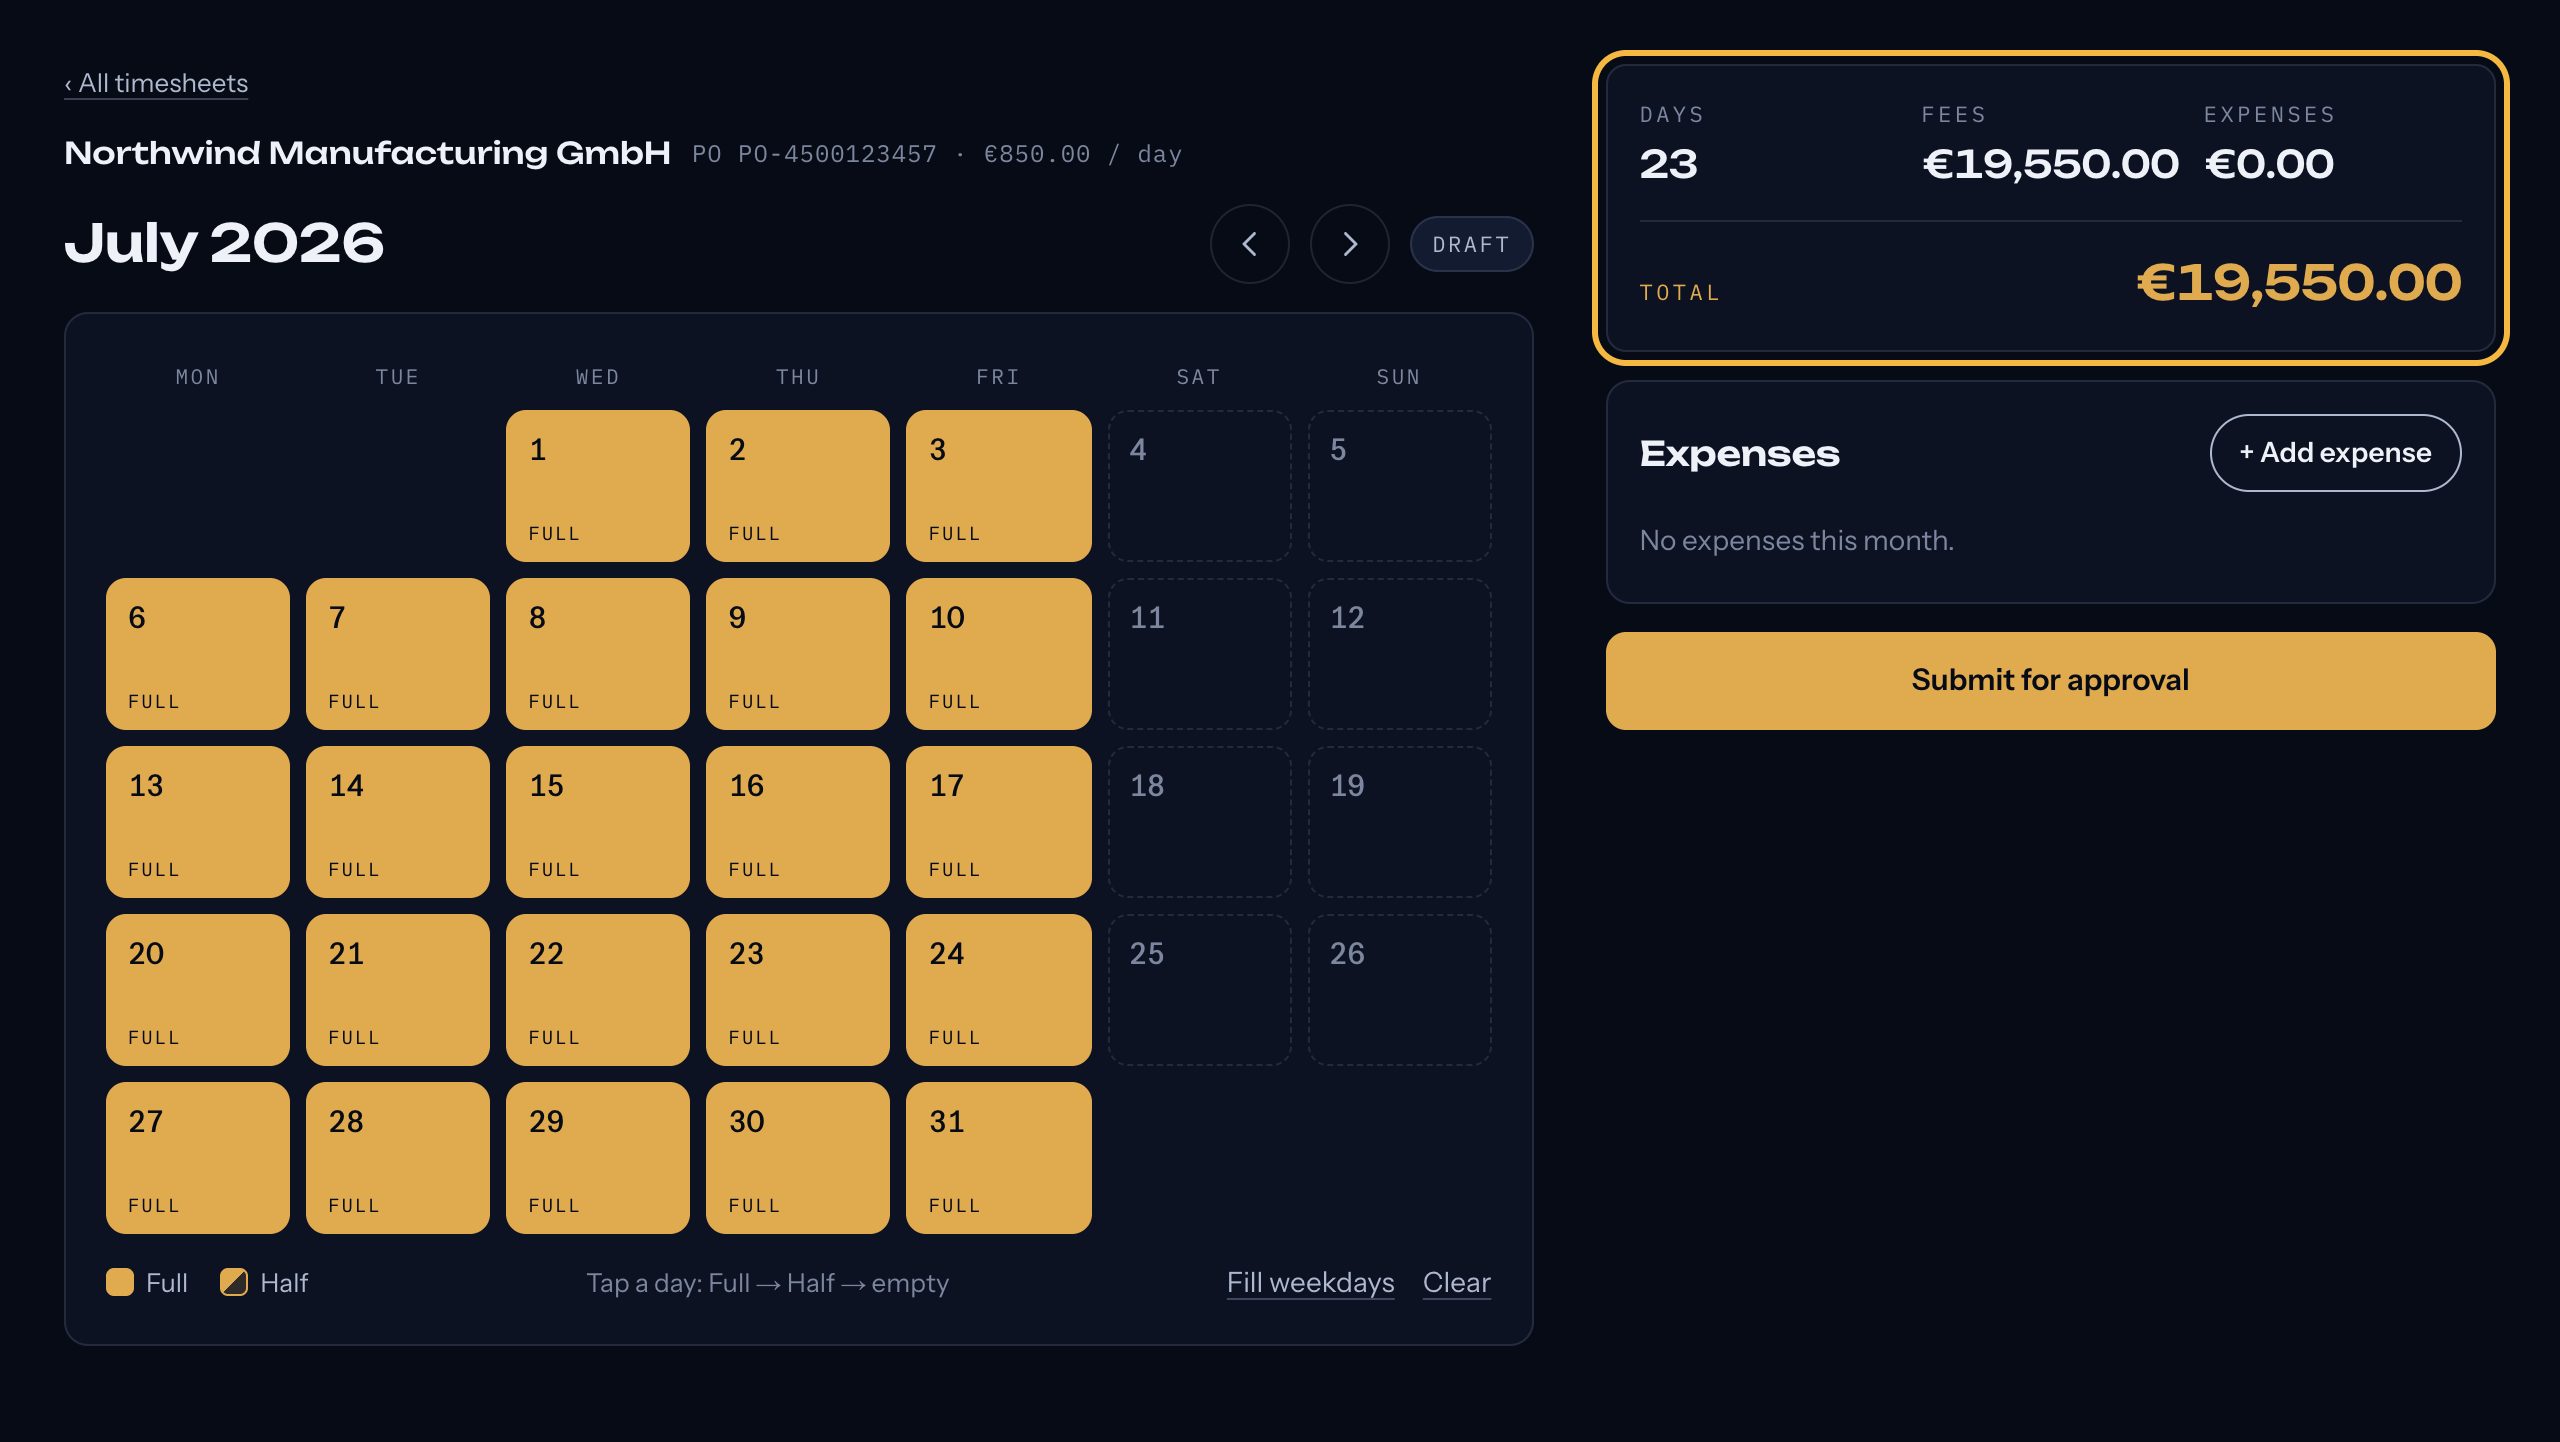
Worked days are gold. The totals on the right update as you go. Add expenses, if the contract allows them
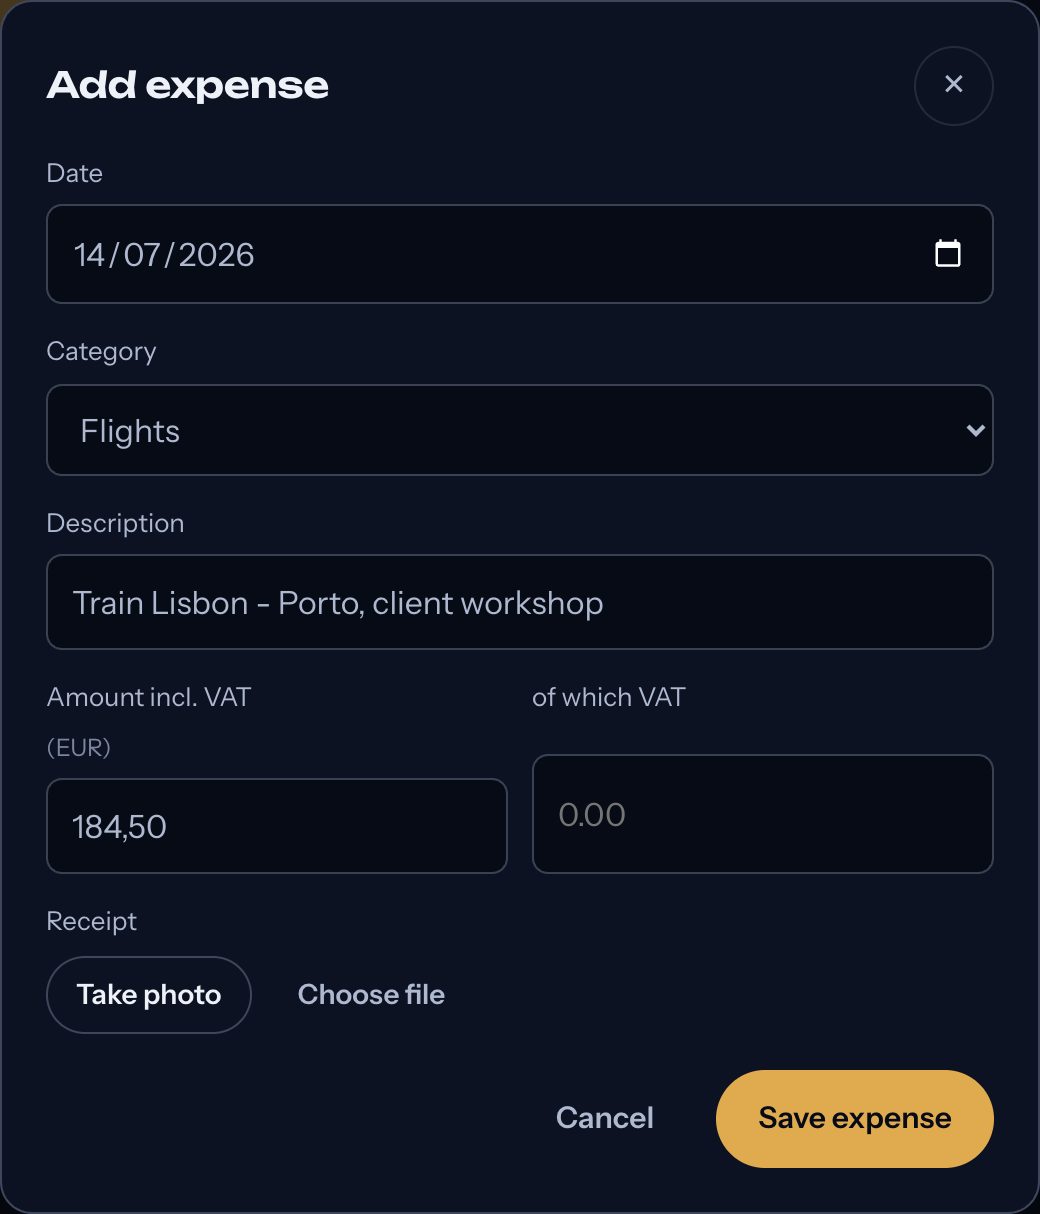
Press + Add expense, fill in the date, category, description and amount, and attach the receipt: Take photo on a phone, or Choose file for a photo or PDF (up to 5 MB). The date must be inside the month. If the button is not there, the contract has no expenses.
Submit for approval
Check the totals, then press Submit for approval. The approver at the customer receives an email with a one-time link, and you are copied. From that moment the month is locked.
Wait for the decision
You get an email when the customer decides. Approved: the month stays locked, and the next step is to upload your invoice. Rejected: the month opens again with the customer's comment shown at the top; correct it and submit again. The customer then gets a new email with a new link.
After approval
How to upload your invoice
When a month is approved, you add your invoice for it to the timesheet. You then see when to expect the payment, and later that it was paid. One invoice for the whole month is the normal case; several invoices for one month (for example one for your time and one for your expenses) work too.
Open the approved month
Use the button in the approval email, or sign in and click the month in All timesheets. A new box, Your invoices, appears under the expenses, marked "Not uploaded".
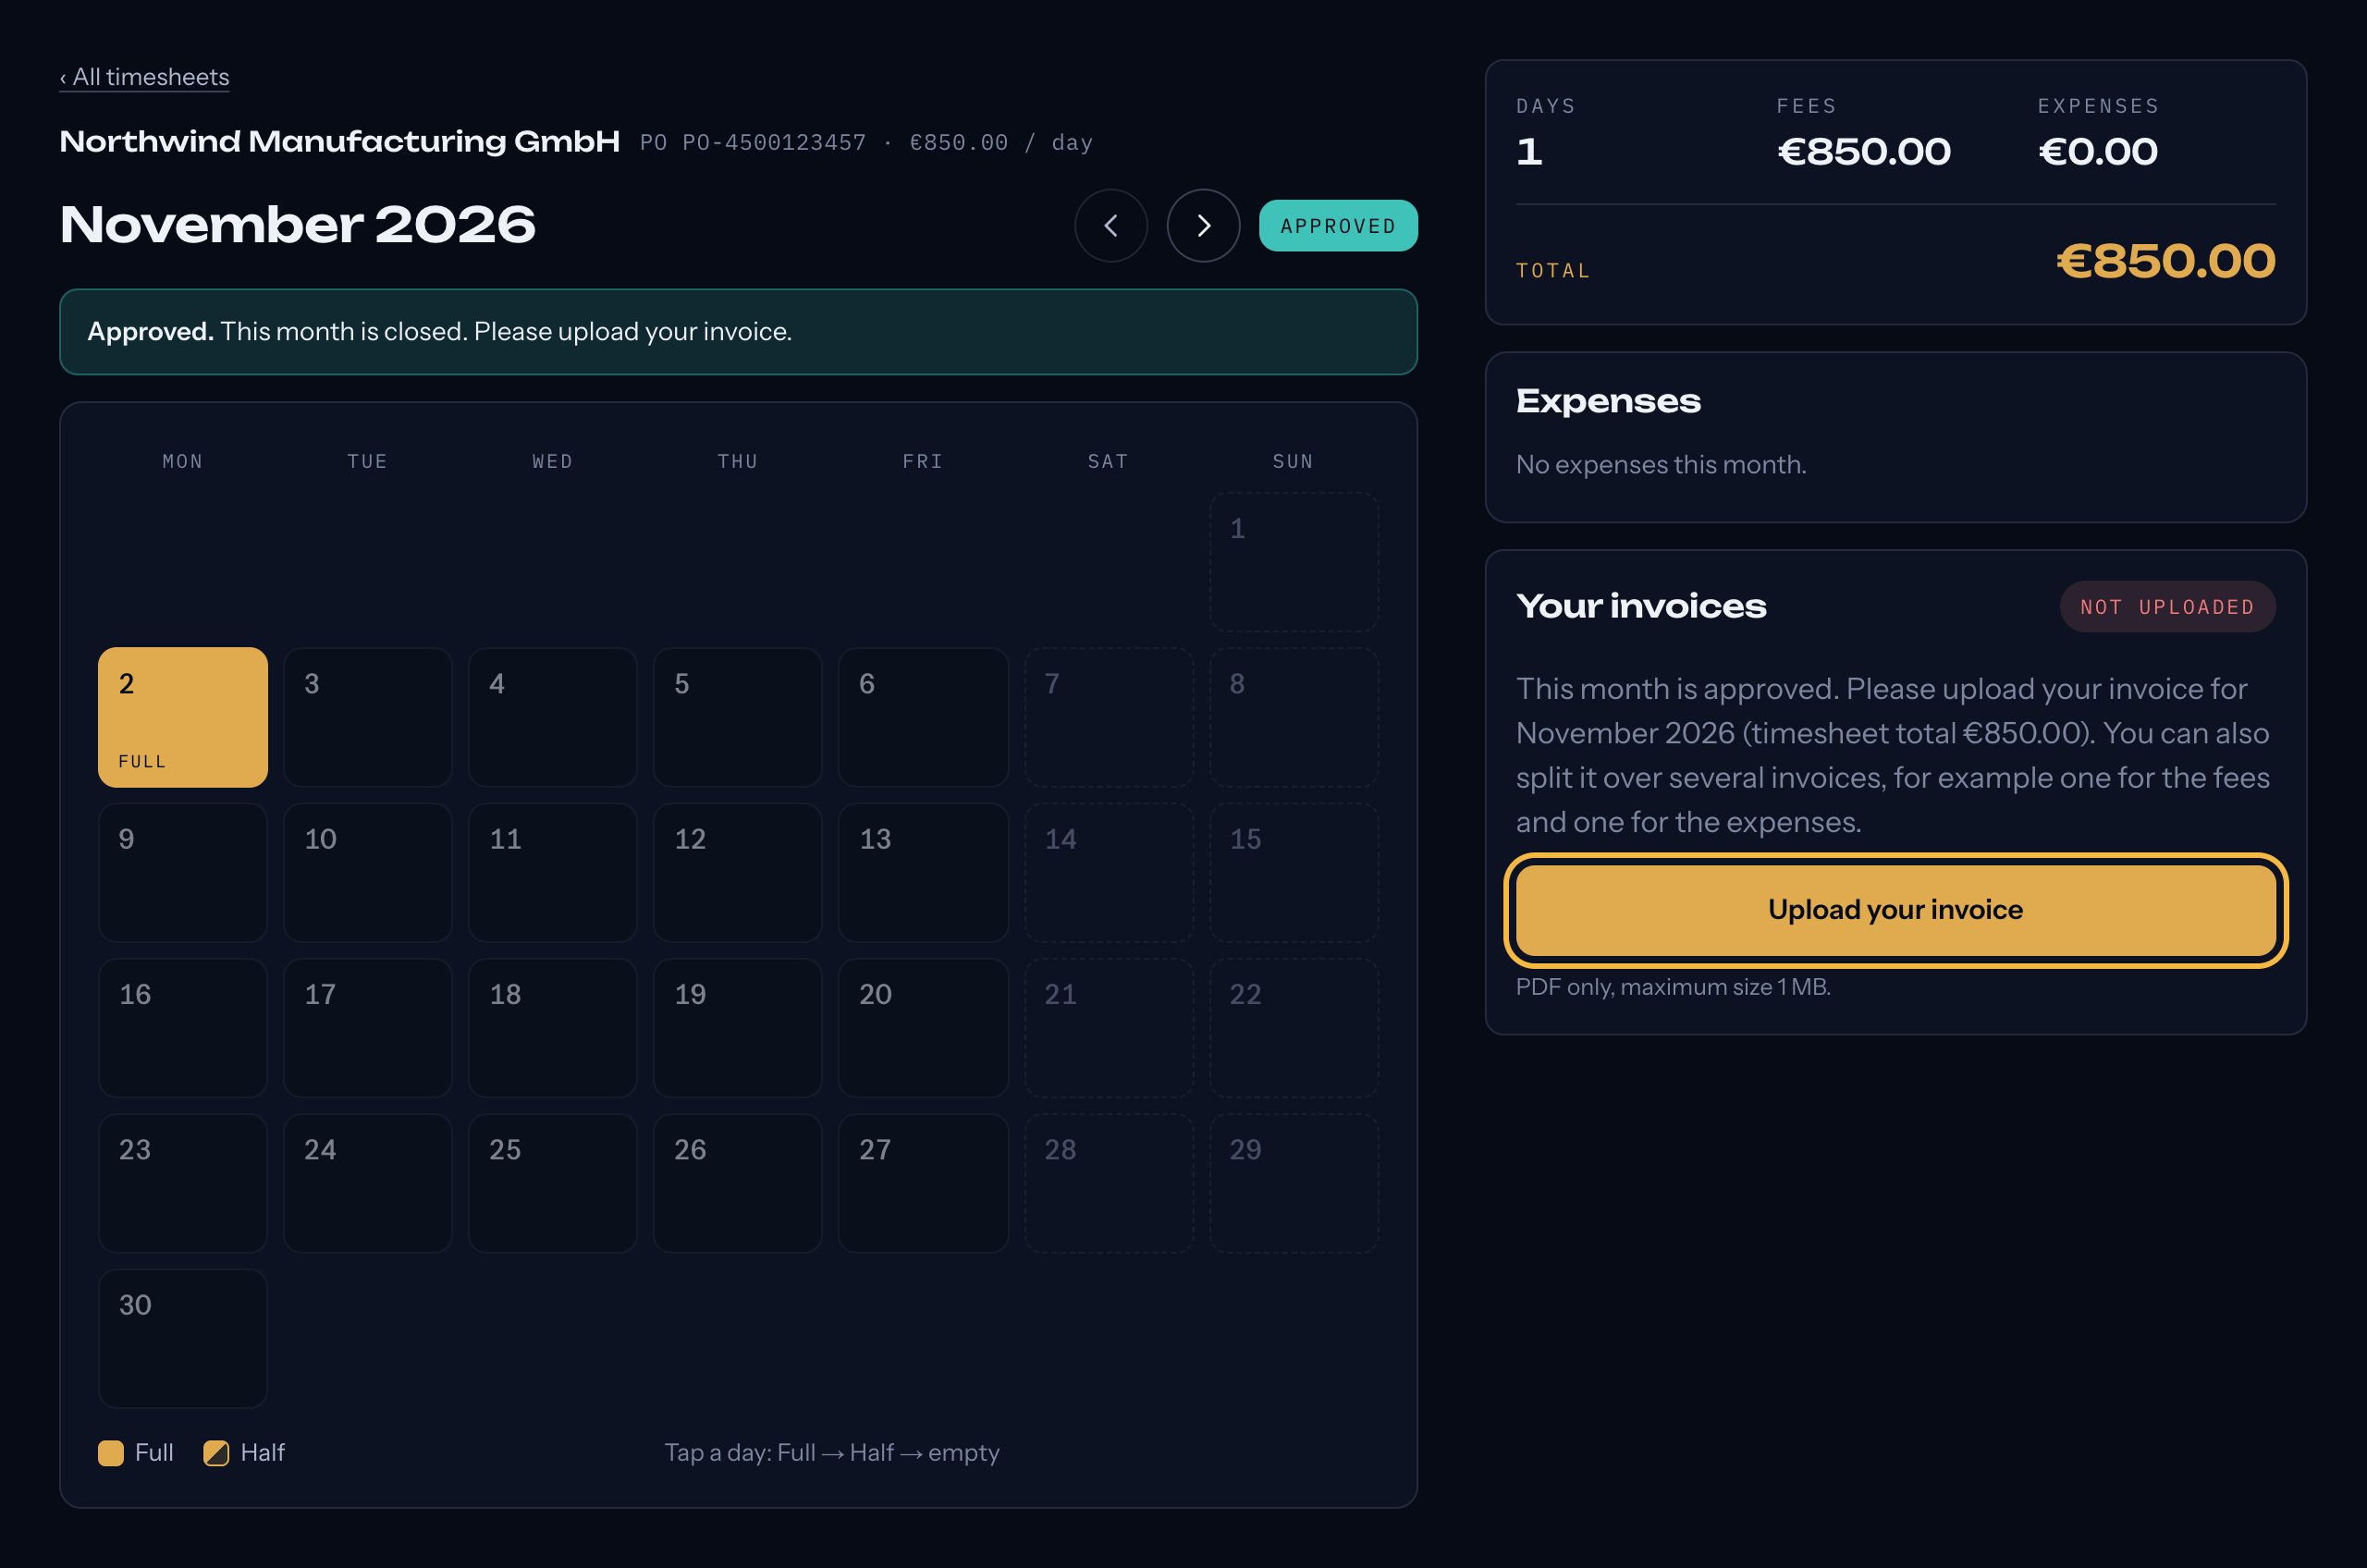
Press Upload your invoice and fill in three fields
The invoice number and invoice date exactly as printed on your invoice, and the value, which is the total of your invoice. It is pre-filled with what is still to be invoiced for the month: the timesheet total, plus VAT if you invoice from Portugal (enter the amounts without VAT if you are VAT exempt). A lower value is fine when this invoice covers only part of the month. A value that would take your invoices above the month is not accepted; if your invoice really is different, contact Eagle Dream first.
Attach the invoice
Press Choose PDF and pick the invoice. Only PDF files are accepted, with a maximum size of 1 MB; a photo or a larger file is refused with a message. An invoice PDF made by your invoicing program is normally well under that.
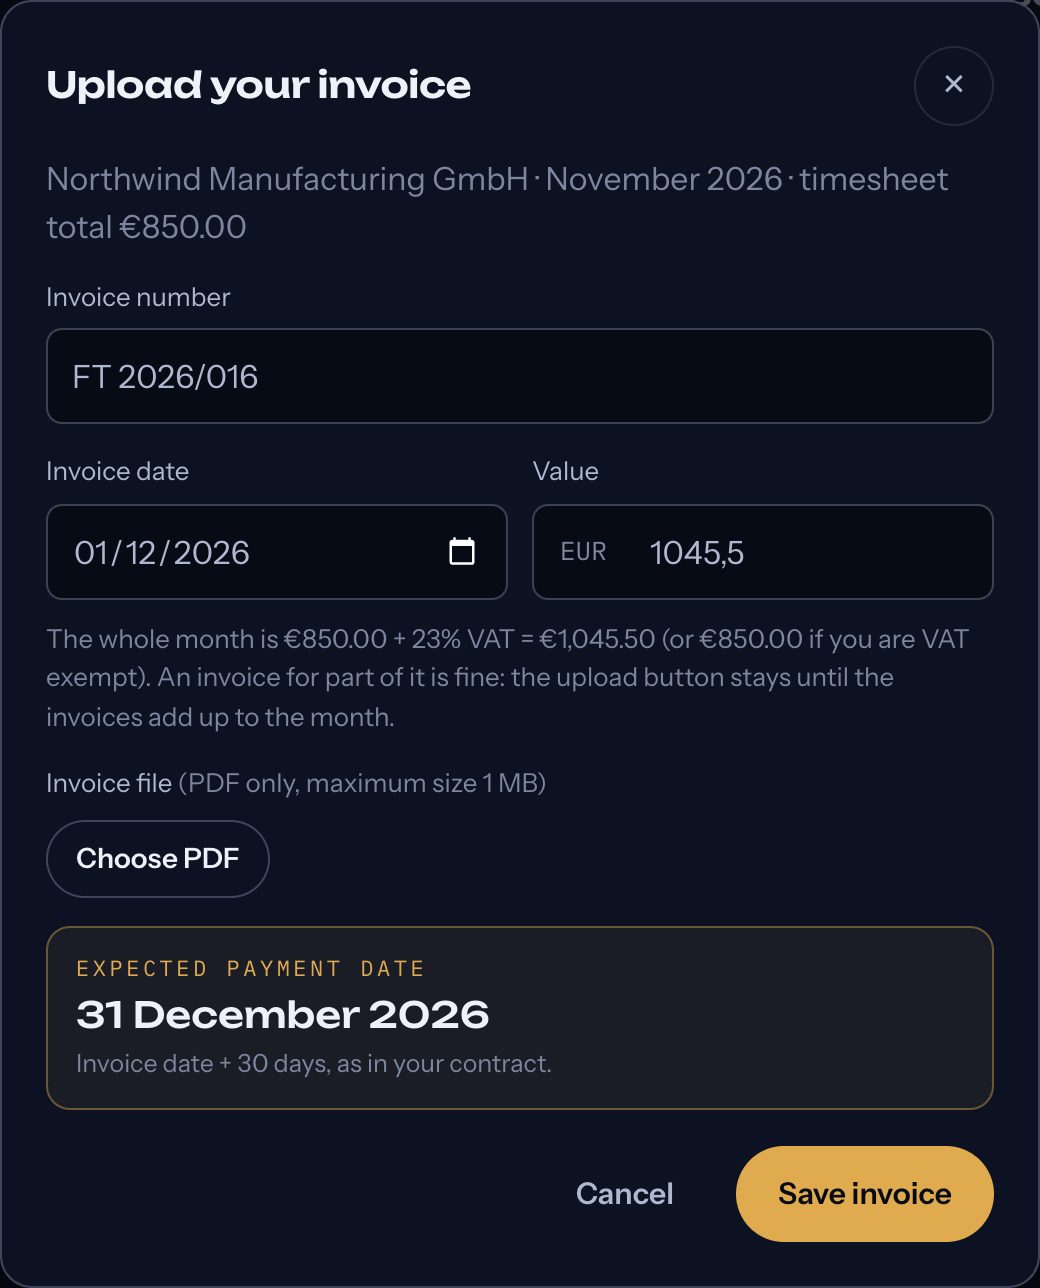
The expected payment date is calculated as you type the invoice date. Save invoice
Eagle Dream is notified. The box now shows your invoice and the expected payment date: the invoice date plus the payment term of your contract. When the invoice covers the whole month, the upload button disappears: the month is fully invoiced.
More than one invoice for the month
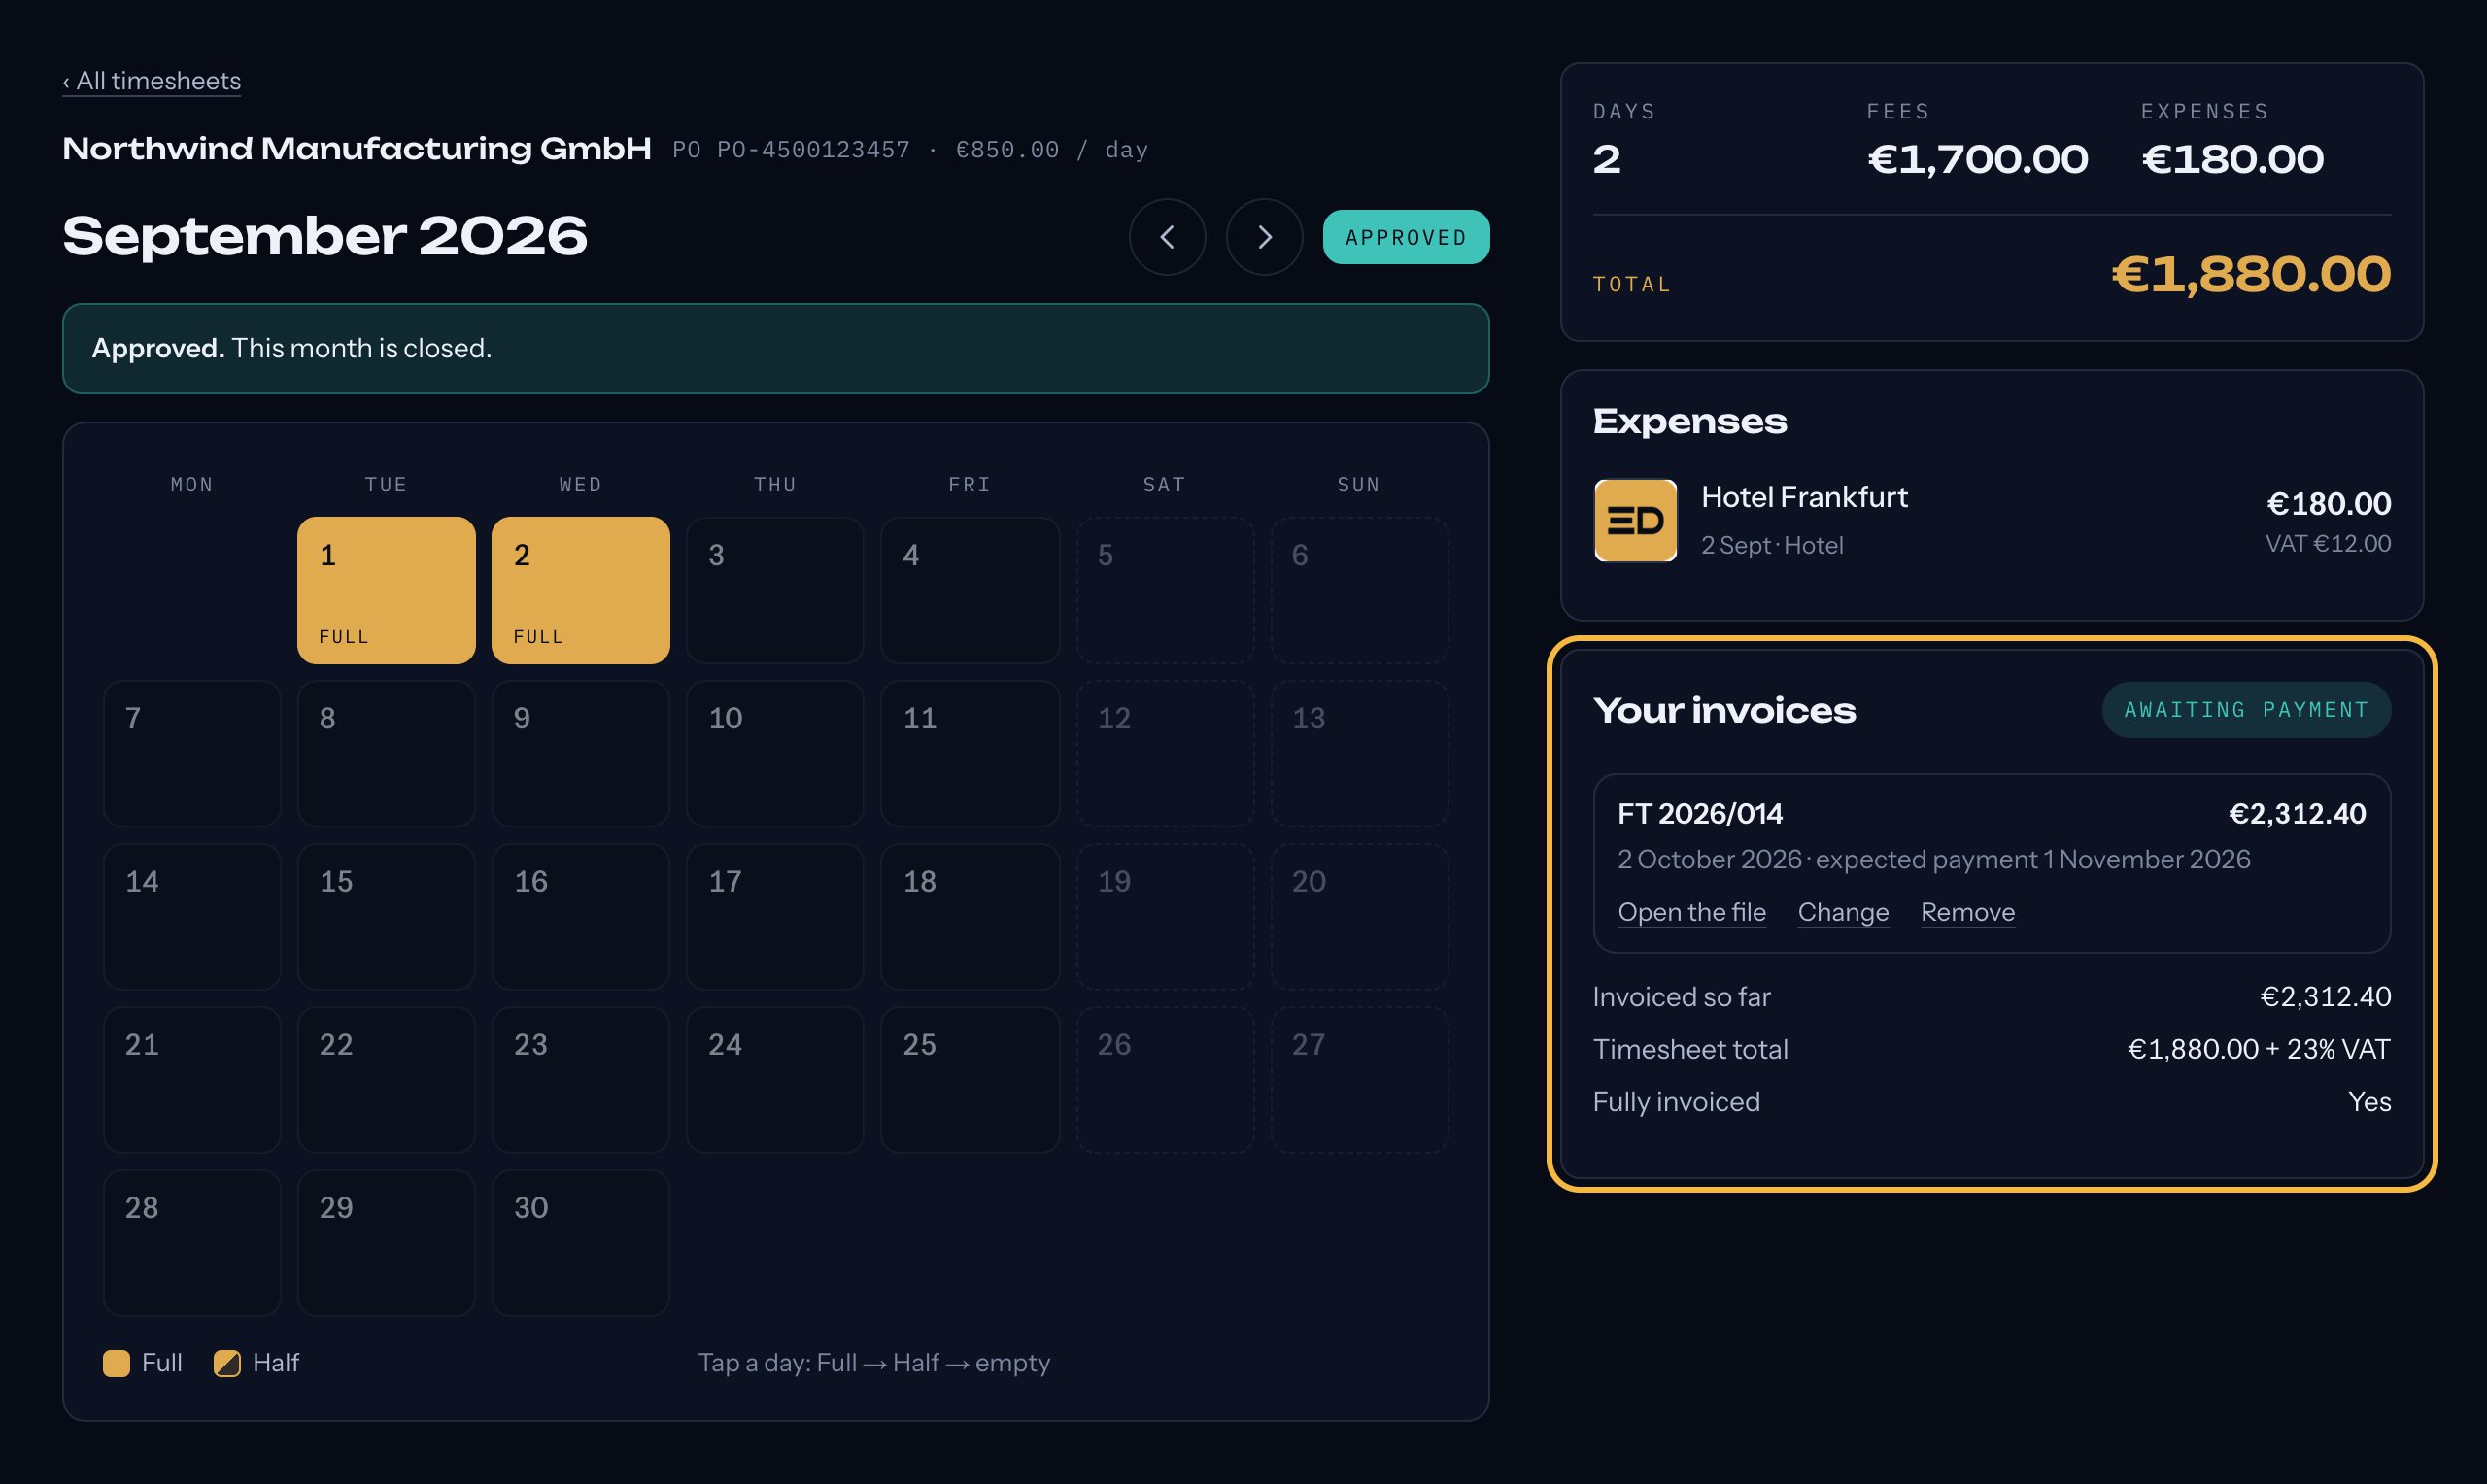
If your first invoice covers only part of the month, the box shows Invoiced so far, the Timesheet total and what is Still to invoice, and the button becomes Upload another invoice. Press it and repeat the steps: the value is pre-filled with the remaining amount. The button stays until your invoices add up to the month.
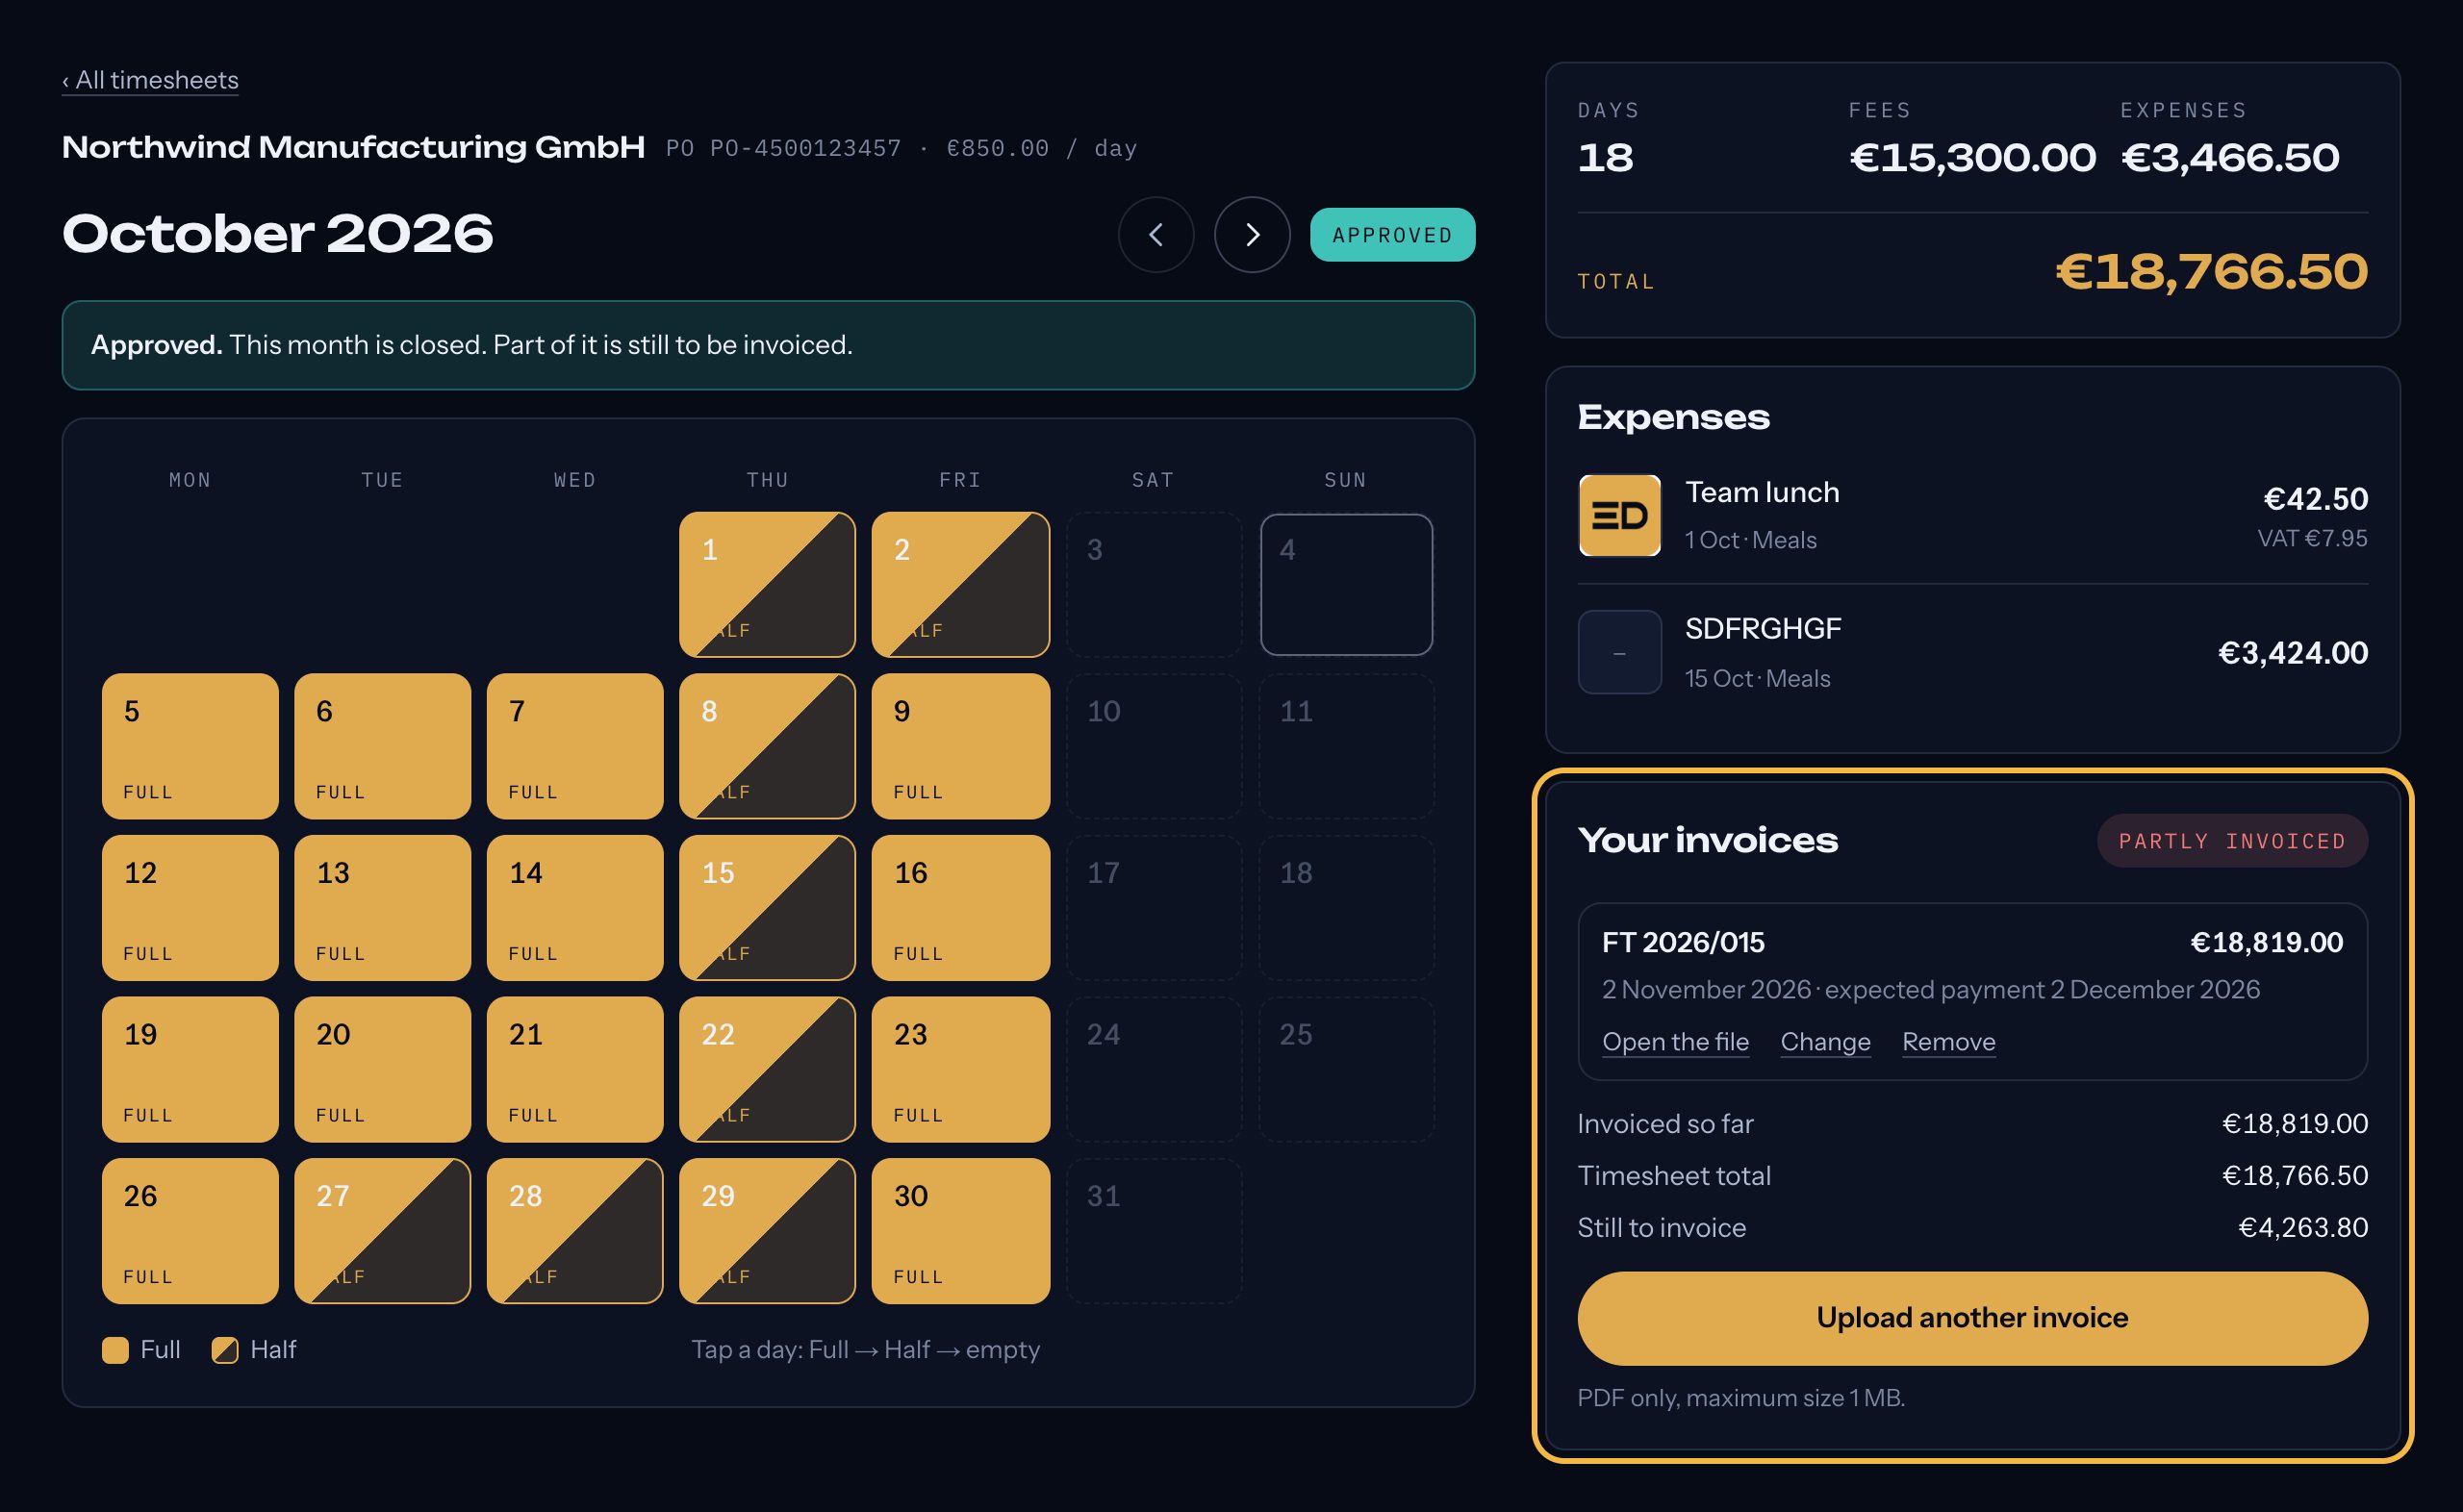
Part of the month is invoiced; the button stays for the rest.
The status of your invoices
- Not uploaded: the month is approved and Eagle Dream is waiting for your invoice.
- Partly invoiced: your invoices do not cover the whole month yet.
- Awaiting payment: uploaded, with the expected payment date shown.
- Partly paid: one of your invoices for the month is paid, another is not yet.
- Payment overdue: the expected date has passed and it is not marked as paid yet.
- Paid: Eagle Dream has paid it; the payment date is shown.
Each invoice has its own links. Until it is paid you can Change its details or its file, or Remove it and upload another. Once an invoice is paid it can no longer be changed. Every invoice needs its own number: the same number twice is refused.
Month under review. If the customer has asked Eagle Dream to look at an approved month again, the box is marked Under review in red and the upload button is replaced by a red note saying so. Eagle Dream then either confirms the month, and the button comes back, or returns it to you for changes (you get an email, and the month shows "Reopened by Eagle Dream" with what to change). This can only happen before you have uploaded an invoice: once a month is invoiced, the customer can no longer ask for it to be rejected.
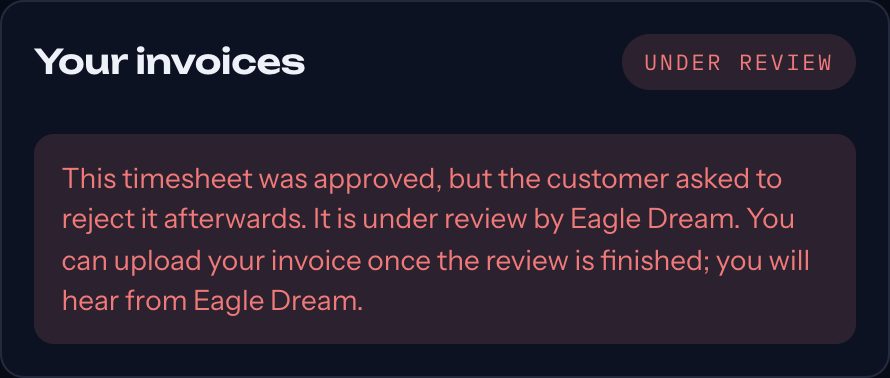
One invoice, one month. An invoice always belongs to a single timesheet. One invoice covering two or more months is not possible: issue a separate invoice for each approved month.
All timesheets
Every month in one list
One line per month and contract: its status, the days or hours, fees, expenses and total at your rate, and where your invoice stands. A month appears here as soon as you have marked one day or added one expense on it, as a Draft, so you can always see what you have started. Filter by status (tick one or more of Draft, Waiting for approval, Approved, Rejected), by contract and by year at the top. Click a line to open that month.
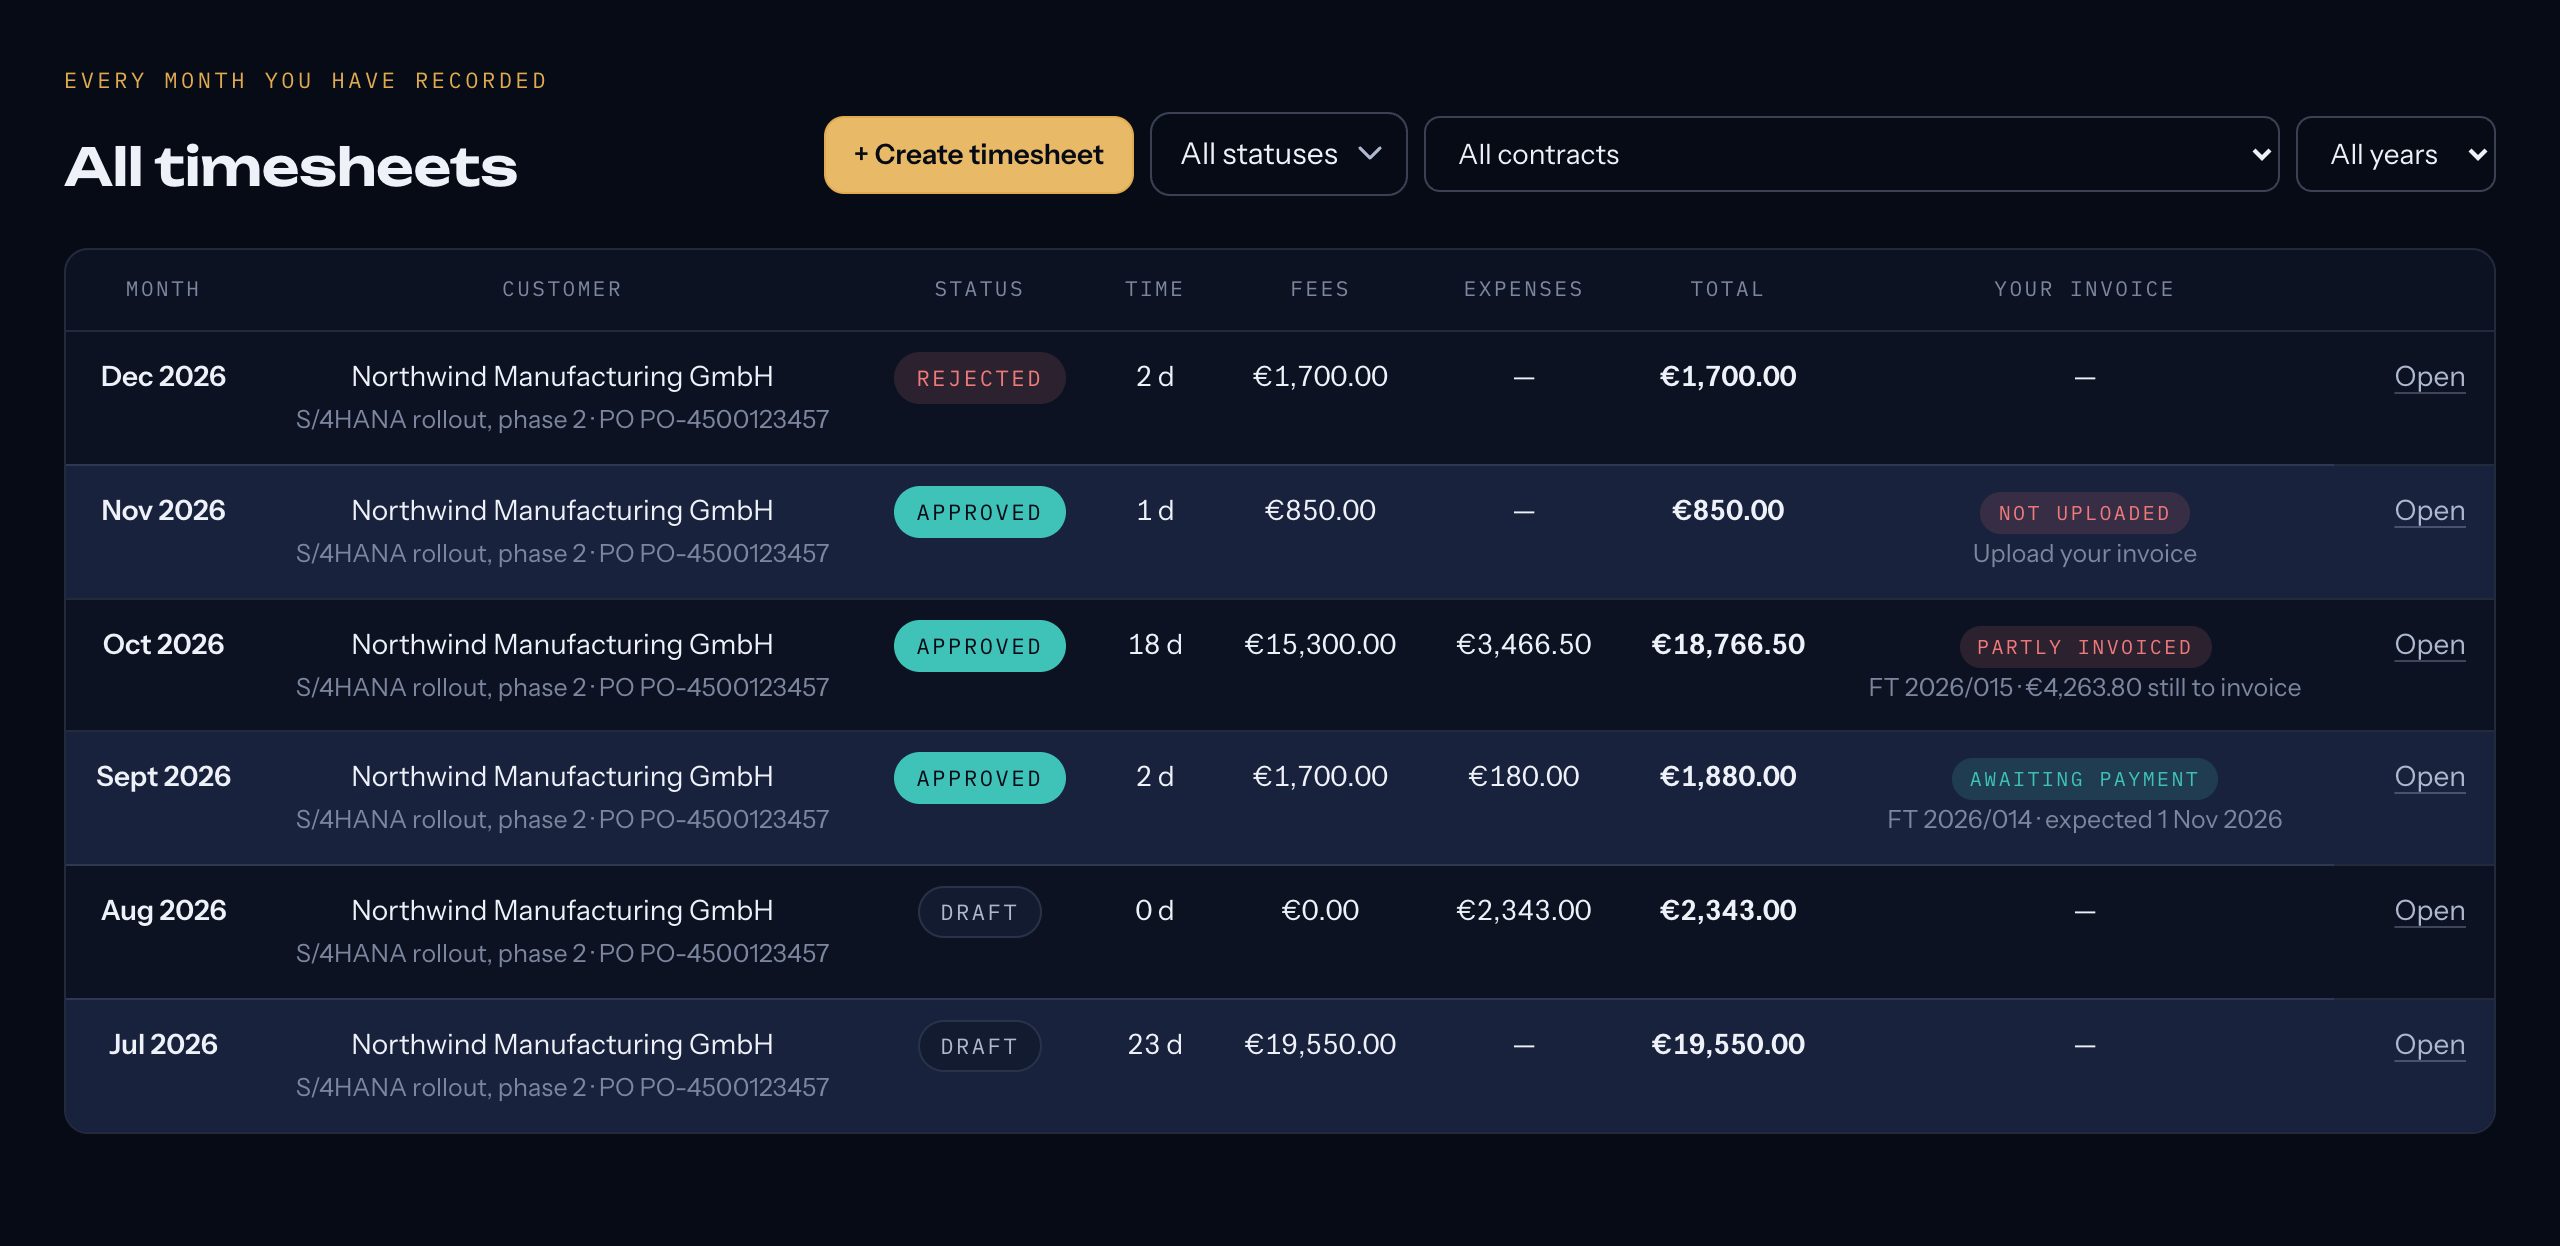
The status of a month
- Draft: you are still working on it. Nobody else has been asked anything.
- Waiting: submitted, and the customer has not decided yet. Locked.
- Approved: accepted by the customer. Locked for good.
- Rejected: sent back with a comment. Open again for you to correct and resubmit. The red bar at the top of the month says who sent it back: Returned by the approver (the customer rejected it) or Reopened by Eagle Dream (the customer asked to reject a month that was already approved, and Eagle Dream agreed).
Contracts
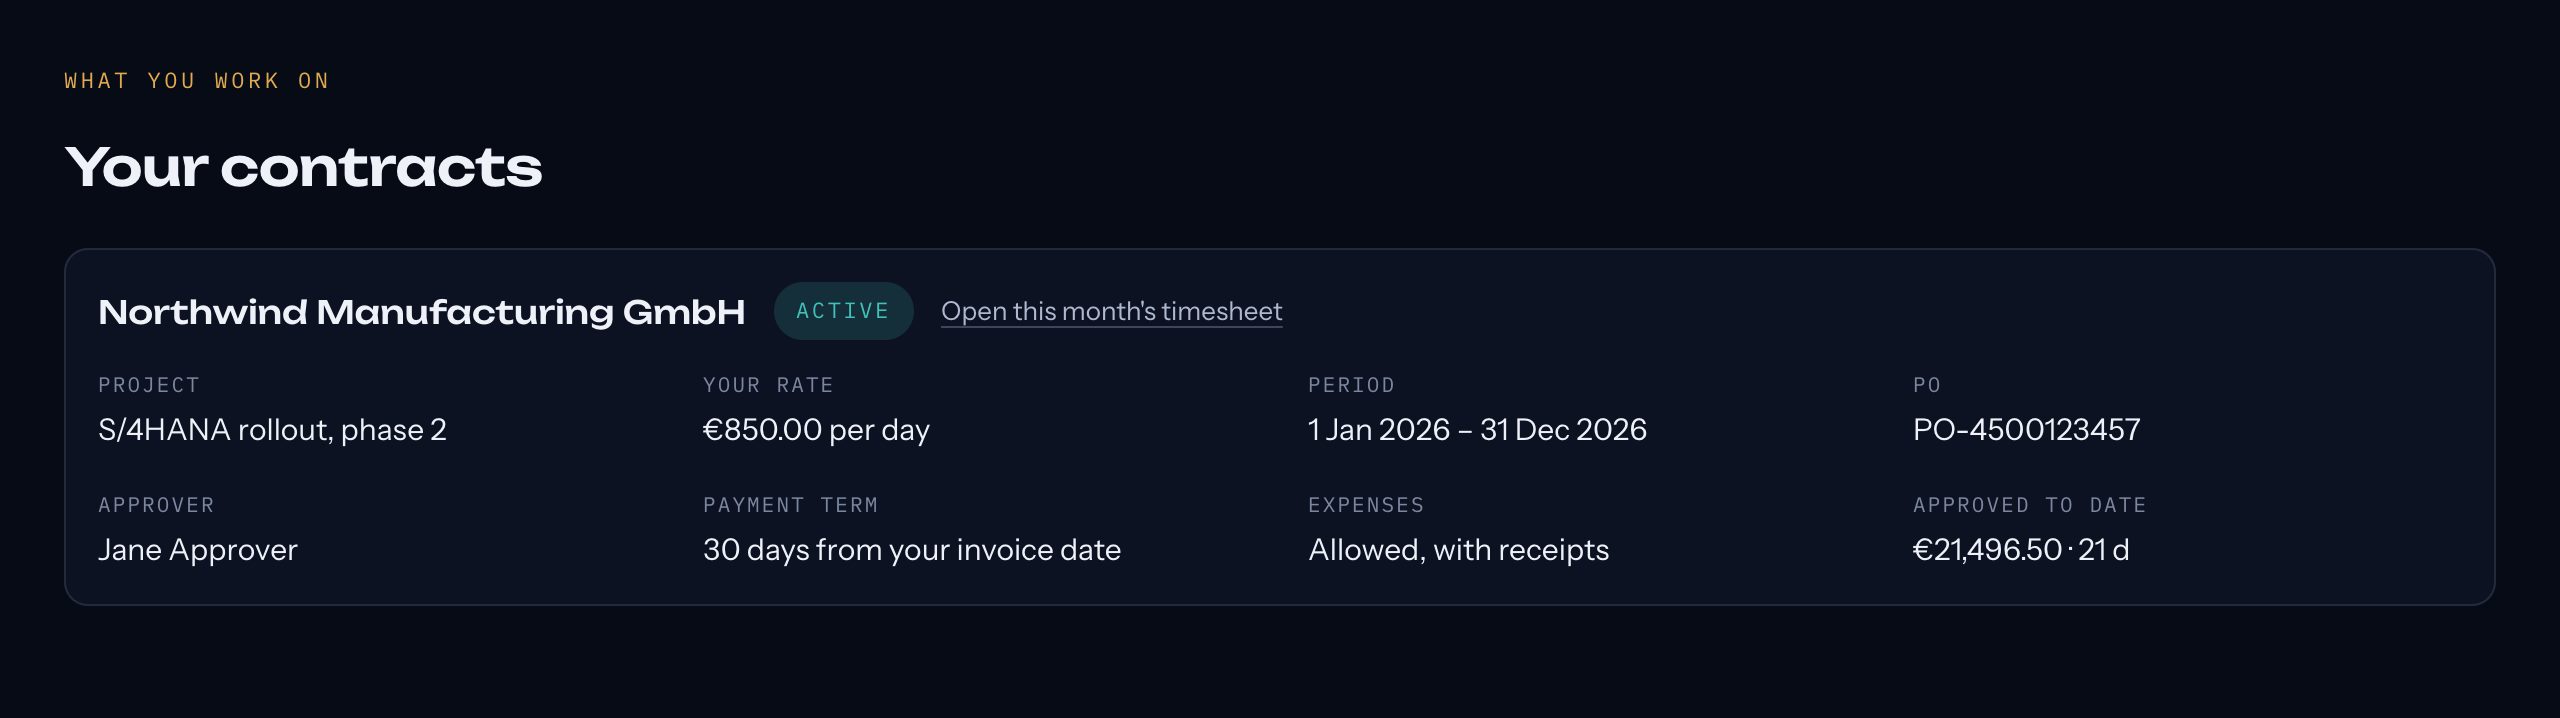
Your contracts
One card per contract: the customer and project, your rate, the period, the PO number, who approves your timesheets, your payment term, whether expenses are allowed, and what has been approved so far. "Open this month's timesheet" takes you straight to the current month of that contract.
Reports
Your figures for the year
Choose the year at the top right. Everything on the page is yours only, at your own rate.
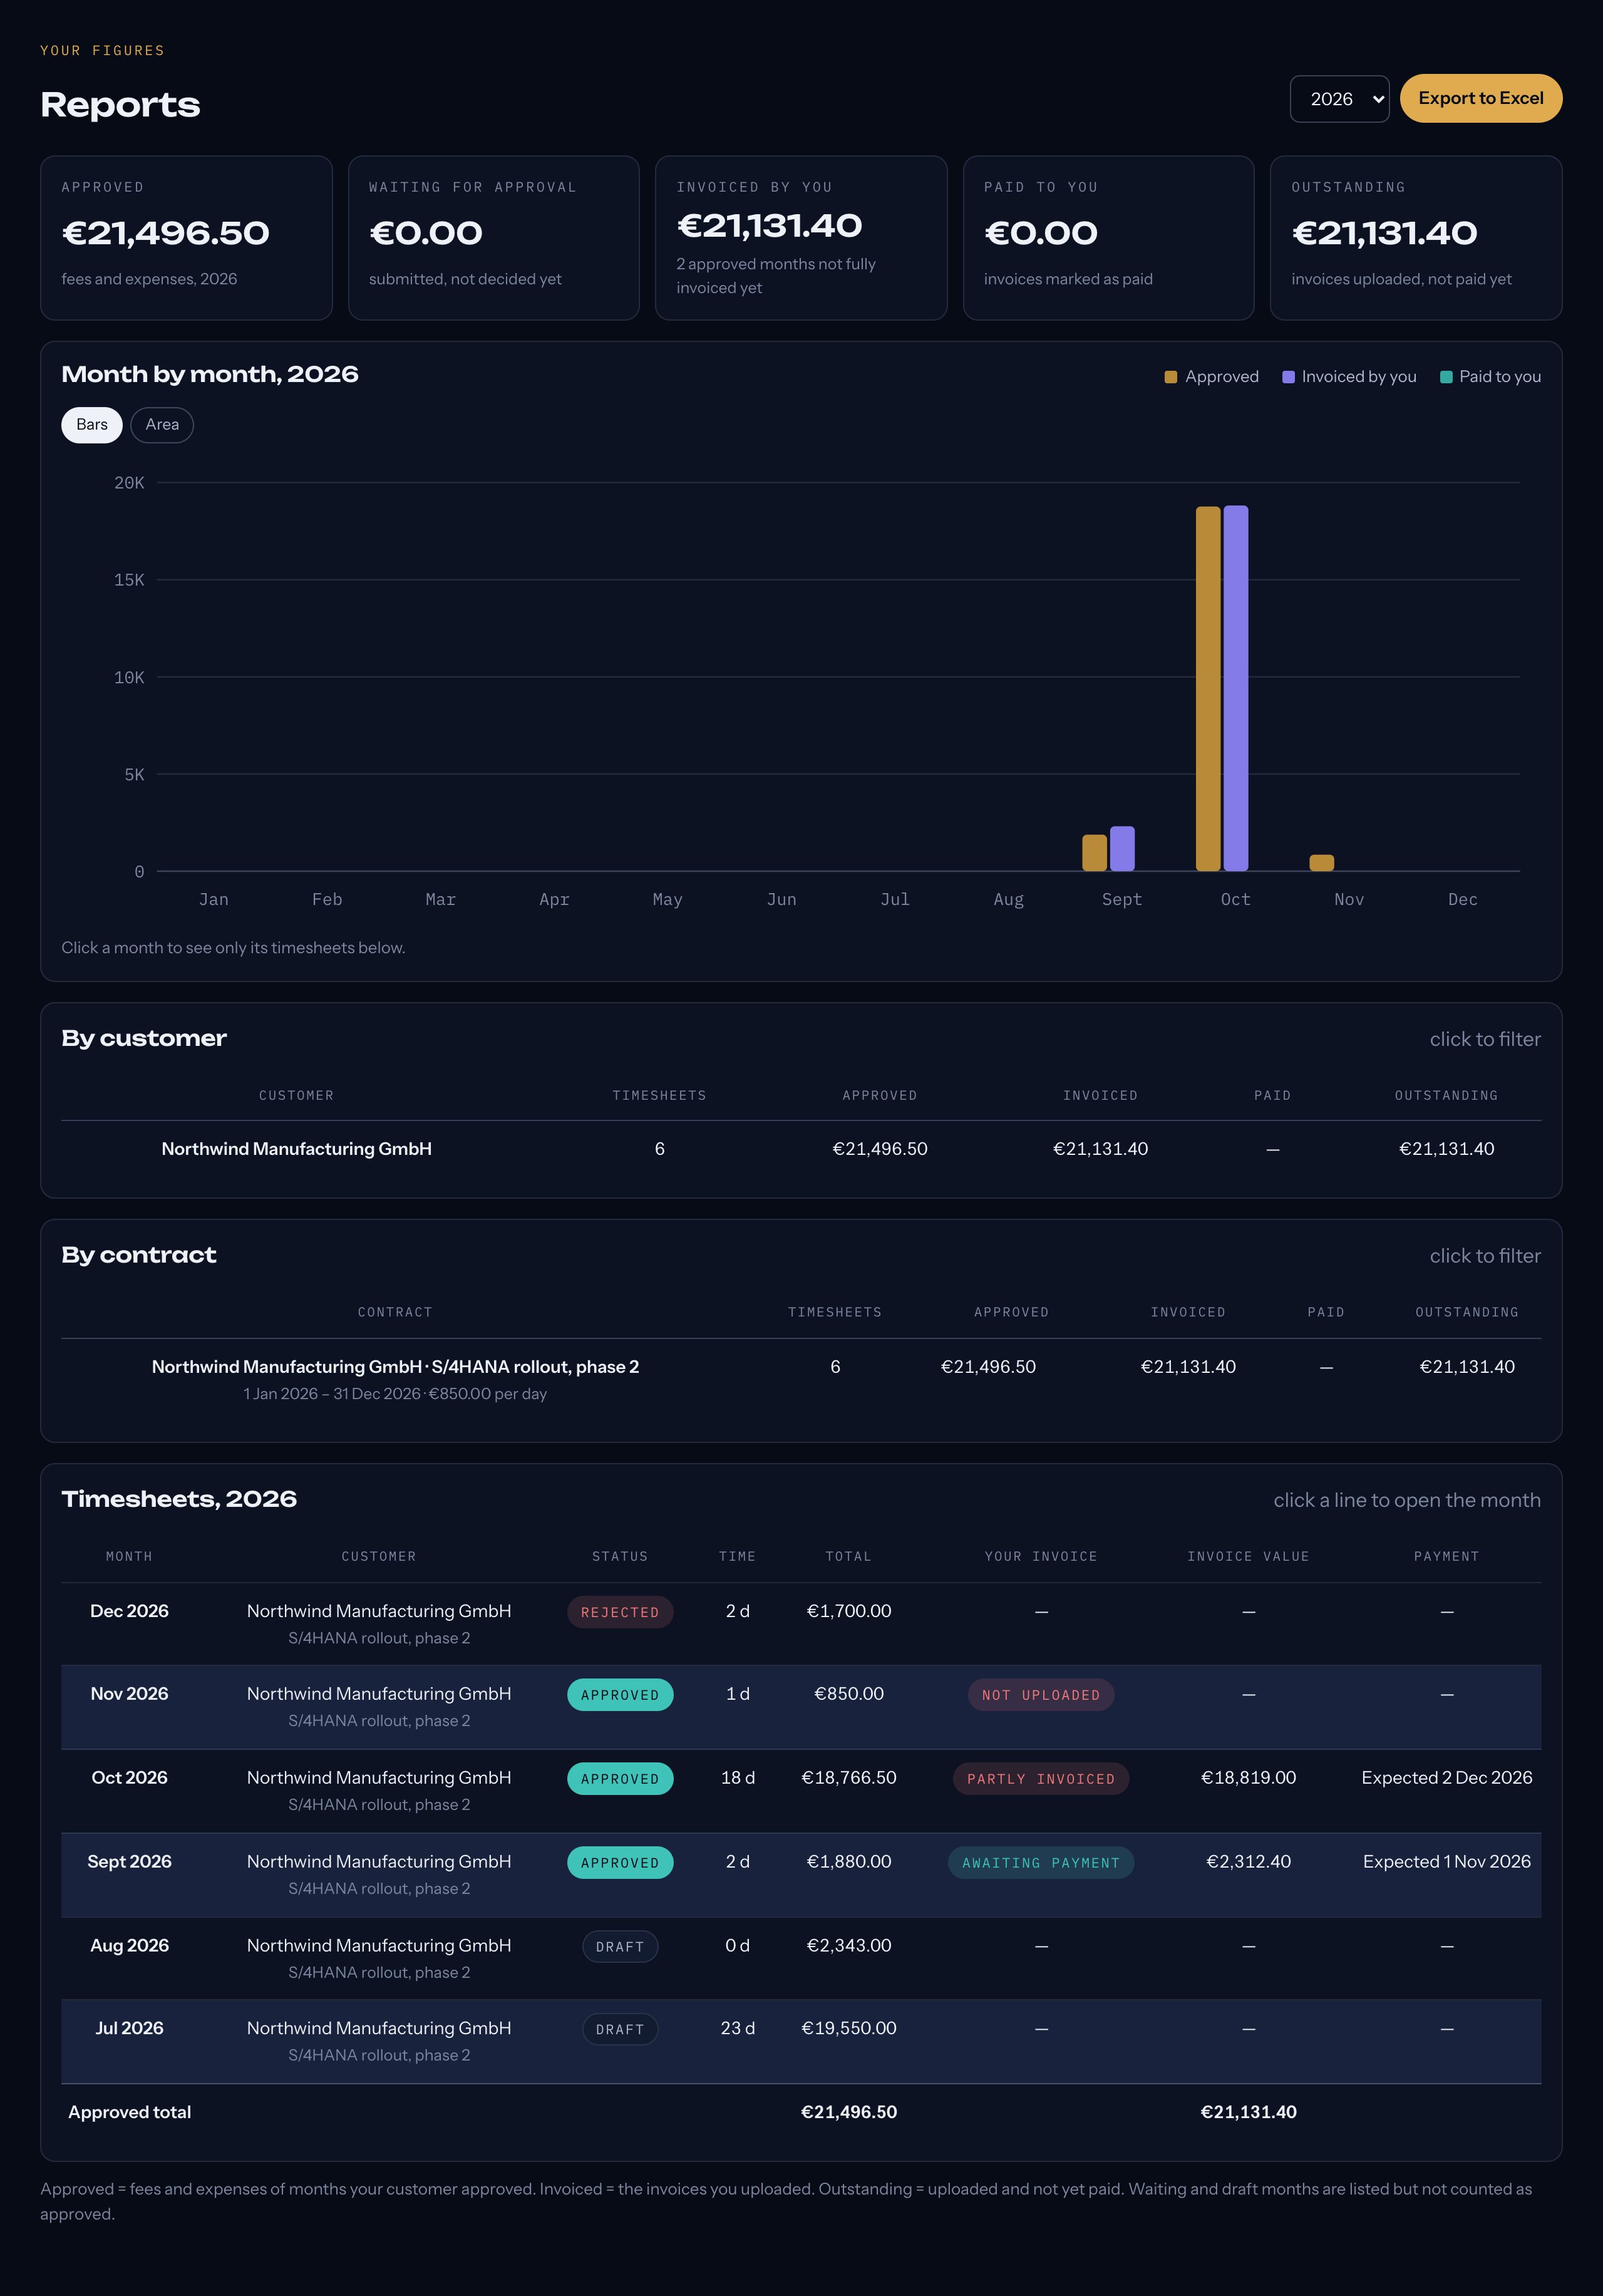
The figures at the top
- Approved: fees and expenses of the months your customer approved.
- Waiting for approval: submitted, not decided yet.
- Invoiced by you: the invoices you uploaded. The note tells you how many approved months still have no invoice.
- Paid to you: invoices Eagle Dream has marked as paid.
- Outstanding: invoices uploaded and not yet paid.
The chart
Three series per month: approved, invoiced by you, and paid to you. Switch between Bars and Area with the two buttons above the chart; your choice is remembered. Hover over a month to read the amounts. Click a month to see only that month's timesheets and figures.
By customer and By contract
Two tables with the same figures per customer and per contract, useful when you work for more than one customer or have more than one contract. Click a line to narrow the whole page to it: the figures, the chart and the timesheet list.
Clear filter
Whenever you have clicked a customer, a contract or a month, a gold bar at the top says what you are looking at. Press Clear filter to see everything again.
Export to Excel
The gold button at the top right downloads the page as an Excel file: the figures, the month table with its chart, the customer and contract tables, and a second sheet with every timesheet and invoice. It exports what you are looking at, so a filter you have set is applied to the file too. The file is named ED Timesheet Report (year) Contractor.xlsx.
Timesheets
At the bottom, the timesheets of what you selected, with their status, total, your invoice and when payment is expected or was made. Click a line to open the month.
The totals box on a month
When a month is open, the box on the right adds up as you fill in the month: the days (or hours) worked, the fees at your rate, the expenses you added, and the total of both.